-
Kathy Eager Creative

Welcome to my site.
I’ve always been a creative person and need creative outlets. I sew, I embroider, I crochet, I paint, I take photos. You name it, I’ve probably done it.
Giving Back
I started my shop to create crochet dolls of feminist icons. As I created them, I decided I wanted to donate to related causes. For example, for each Ruth Bader Ginsburg doll I sold, I donated to the ACLU. I’ve donated over $200 to various organizations.
Then the pandemic hit and I made masks. For each mask sold, I donated one to a hospital or food bank. I donated over 300 masks!
Recently I’ve been painting landscapes and hiking-inspired watercolor paintings, and donate to the Mount Washington Observatory. Thank you to all of you for supporting me, and through me, supporting others!
Interests
I love hiking. Much of my inspiration comes from hiking. Be it paintings of mountains or crocheted mushrooms.
I’m a big geek. I love Star Wars and Doctor Who. I geek out on tech and gadgetry.
I’m a car person without being a big car person. Ha! I love my MINI Cooper, I autocross, I’m even a co-host on a car podcast, but I can never remember car models and can’t really do any car repair.
Where to find my stuff
At the moment, you can buy my art directly on my site, just by filling out the contact form below or on any of the posts you see on the site. Or you can check out my Etsy shop. Or for stickers and notebooks and such, check out my Redbubble shop.
Supplies
Want to support me and my creativity (besides buying my art)? Here’s a link to my BLICK arts wish list. Or like and follow on any of my social media accounts. Thank you!

-
Mountain Quilt x2

Despite saying no more triangles, after “Shimmering Snowflake“, I decided I really wanted to make matching mountain quilts for two of my hiking buddies, which unfortunately meant more triangles. A lot more triangles. AND I made two of this quilt at once. Not sure if that was easier or harder. Ha!
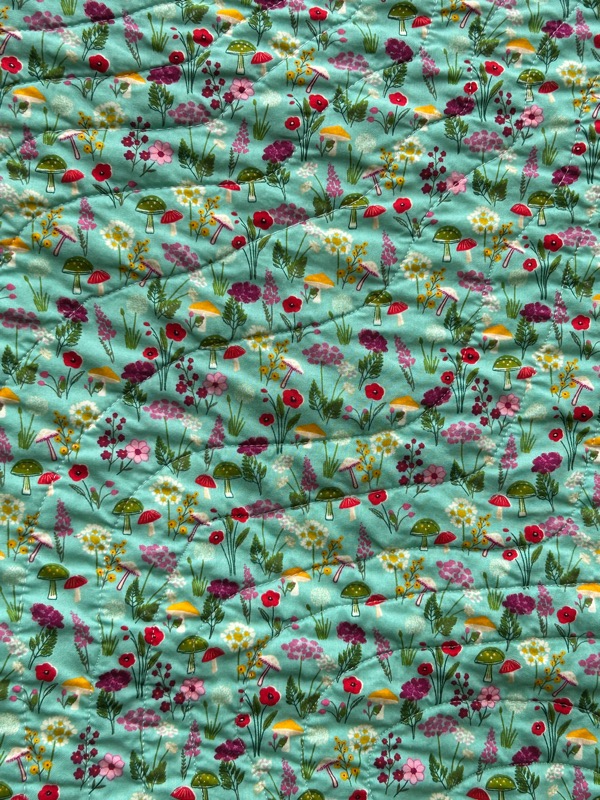
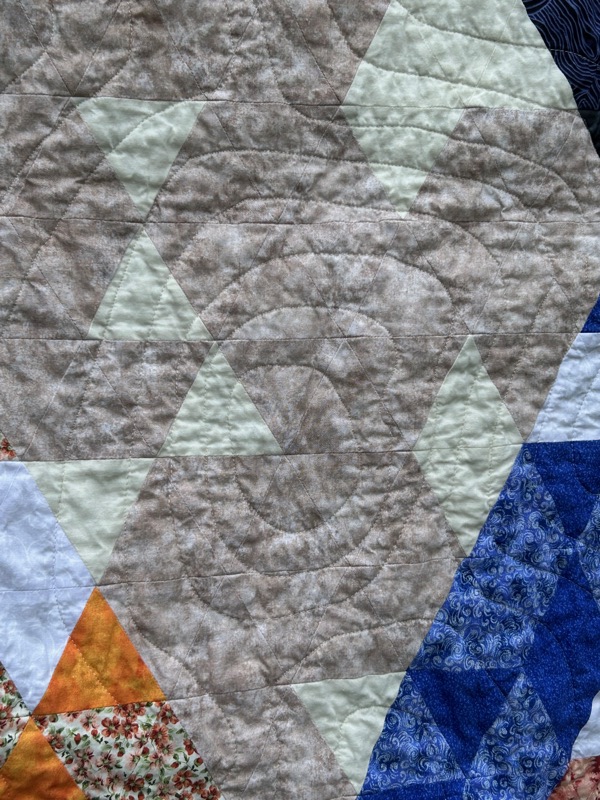

Top left: the backing. Top middle: close up on the quilting. Top right: close up on the border
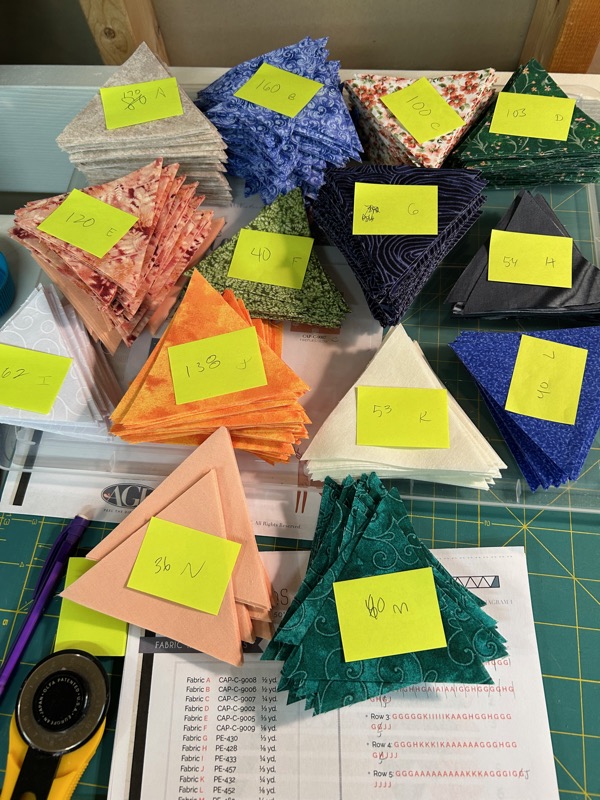
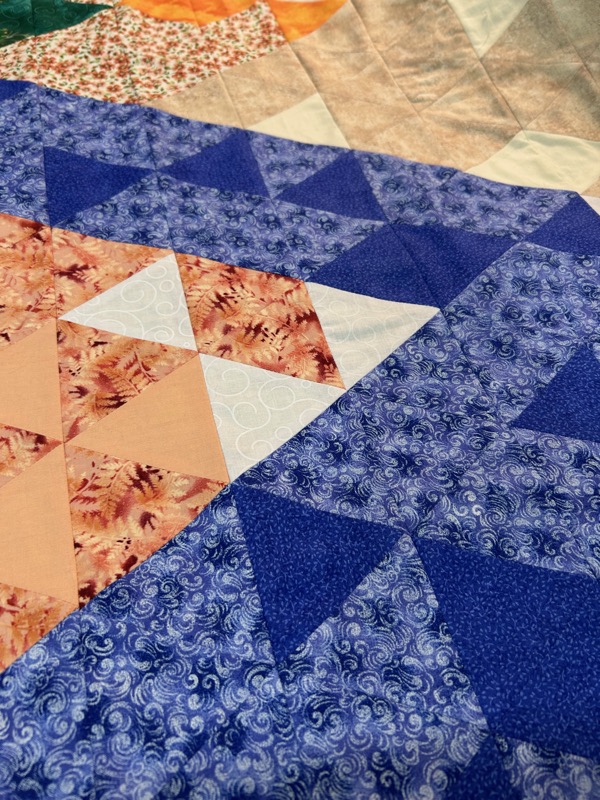
Bottom left: triangle organization. Bottom right: the top once pieced and before quilting
The pattern is “Mountains” by AGF Studio. I made a couple of modifications. The upper right “mountain” had a jagged edge and I think it was supposed to be the sun, but I smoothed it out to make another mountain. I thought that made more sense with the dark sky. I also added a border of “chips”, to make it a bit bigger.
I loved picking the fabrics for this. I also love the final look. I definitely need a break from triangles though! So much more pressing and fiddly-ness.


The above shows partly how to get those points perfectly lined up! Use a pin to go through each triangle point, then clip the fabric together and sew through the point you can see. Since you lined them up with the pin, you know they’re matched up and you’ll go through both points perfectly.
My two hiking buddies loved their quilts! I was tempted to keep them for myself, I loved them so much. I would have made a third one for myself, but alas, I didn’t have enough fabrics, and while I worked on this Joann Fabric closed for good. 😦
Finished size: 42″ x 58″
-
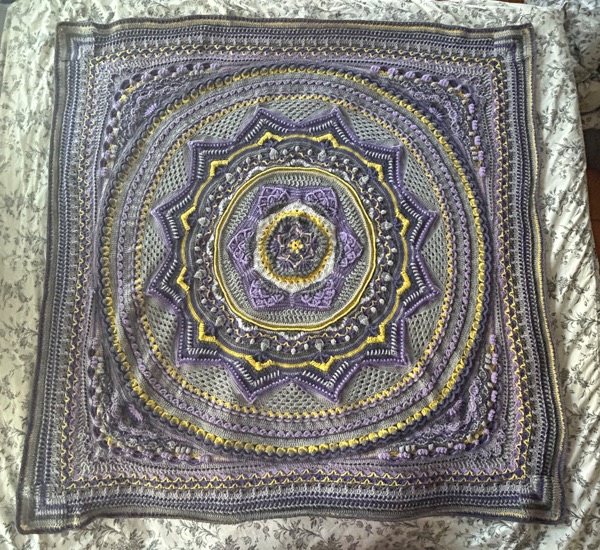
Crochet Mandala

I started this blanket a WHILE ago. I remember working on it during my “creativity every day” year, which was back in 2022.
Finally finished it! The pattern is from Crystals and Crochet, called Sacred Space. It’s broken into parts and includes videos for each part. Completely free!
Since this one is for me, I can have my cat shown for size. 🙂 The middle photo is truest to color. For some reason it looks washed out in the photo showing the entire blanket.
Finished size: 60″ x 60″


-
Scrap Management

Every quilter has a stash pile (or bag, or bin, or many bags or bins). When you cut fabric for a quilt, no matter how hard you try, you are going to have leftovers. They can range in size and shape, and for many of us, they get thrown in a bag and forgotten about. Tackling the bag can seem overwhelming.
I recently saw some videos by Karen over at Just Get It Done Quilts regarding scraps. She talked about PROCESSING your scraps. Meaning, don’t just throw them in a bin, but instead cut them into useful shapes/sizes, so you can grab and go when you’re ready to use them. And she mentioned the key point of processing, which is knowing what you’re going to use all those scraps for before deciding what shapes/sizes to use.
It seems so obvious, but I had never thought about it. I was just sorting random shapes and sizes of fabric by color. It wasn’t helpful or useful. I started cutting into various square sizes, but again, not really useful. I didn’t know what to do with a bunch of random squares in multiple sizes.
I enjoyed Karen’s “chip” patterns, which use rectangles that are 2 1/2″ x 4 1/2″. OK, great, that’s one size/shape to process. I found in my stash a bunch of 2 1/2″ squares. Awesome, that’s two. Hmmm, they’re both 2 1/2″. My bindings are 2 1/2″. Are you seeing a theme? Plus, there are loads of patterns that exist for Jelly Rolls, which are 2 1/2″ strips.
So, now I process my scraps into:
- 2 1/2″ strips, the longest I can get out of the scrap
- 2 1/2″ x 6 1/2″ rectangles
- 2 1/2″ x 4 1/2″ rectangles
- 2 1/2″ squares
I can use the strips for Jelly Roll patterns and bindings. I can use the rectangles and squares in a ton of different ways to create blocks. Here are ten I came up with in just a few moments. (Two I saw on Karen’s site, the “+” and the “o”).

It makes it so much easier to process my scraps now! No more staring at the piece wondering what to do with it. No more struggling to decide what shape or size to cut it into. And much easier storage! I can just store them by the four sizes, all ready to go!
Bonus tip (again from Karen!): if you keep some of these by your sewing machine, you can piece these together as your “leaders” and “enders”, magically growing your pieced blocks while you work on other quilts!
-
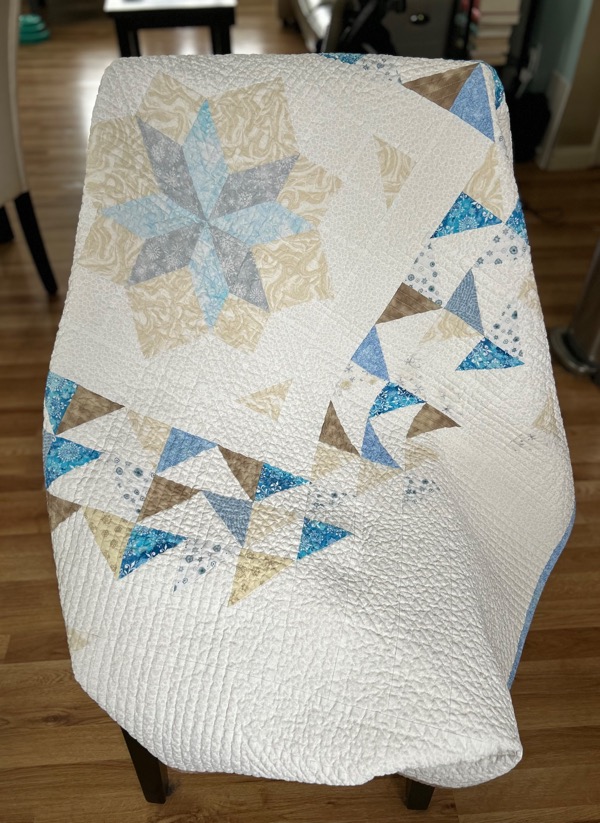
Shimmering Snowflake
I have a very dear friend. In addition to being my friend, she is also my “call NH Fish and Game if I don’t check in after a hike” person. While she is incredible, she has one major flaw: she loves snow. I don’t get it, but I love her anyway.
I decided to make her a quilt, and of course, snow had to be involved. I found “Shimmering Snowflake”, a Robert Kaufman pattern. Unfortunately for me, it involves mostly half-square triangles. I’m not a fan of triangles in quilts I make. They’re fiddly and potentially difficult.
Quick fabric digression: Fabric has a warp and weft. That means the fibers go up and down, and left and right. Cutting squares and rectangles “on the grain” means aligning with the warp and weft. It keeps the fabric stable. When you cut diagonally (as you would for a triangle), you no longer have the stability of the warp and weft working for you. The fabric becomes stretchy. When sewing pieces together, stretchy is bad. The fabric can distort, and when sewn together, may no longer lay flat. Not good for a quilt.
Quick triangle digression: Triangles have points. When quilting, you have to be much more careful with triangles to be sure you don’t cut off the points when sewing pieces together. If you shave a tiny bit off of a square or rectangle, it isn’t so noticeable. If you cut off the tip of a triangle, it’s very obvious. Fiddly.
This pattern has 132 “half square triangles”, which is really 264 triangles that are paired up into squares. Now, the good news, is that half square triangles mitigate some of the stretch, since you sew squares together, and cut them apart into half square triangles. Meaning, the potentially stretchy diagonal isn’t ever unsewn. You sew, then cut. Providing some stability.
However, in order to preserve those lovely points, you have to be sure your squares are perfect. The diagonal has to go corner to corner. So there is a lot of trimming involved. Again, fiddly.
You can buy specialty rulers, but I’m trying to not spend money I don’t need to spend, so I used some painters tape to convert one of my rulers into a half-square triangle ruler.

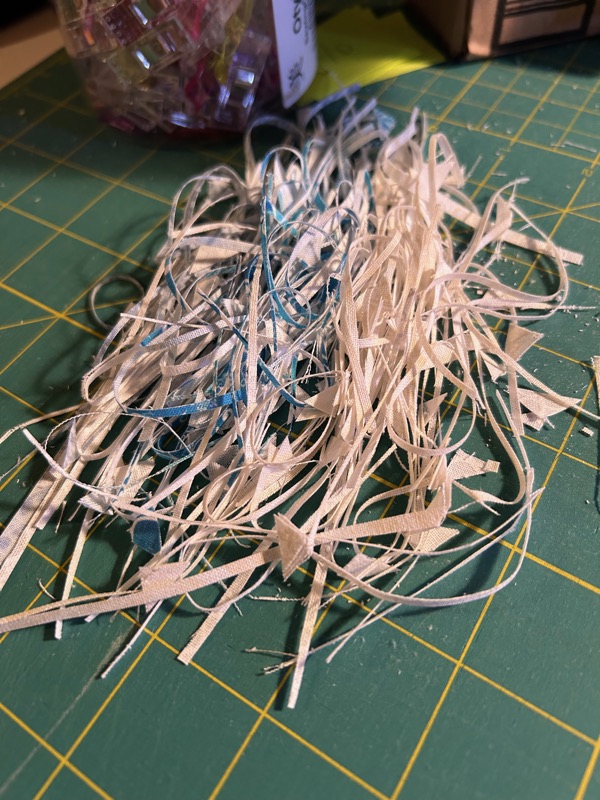
Line up the diagonal of the square with the diagonal tape, make sure the bottom part fills the blue tape, cut off the excess. Flip it around and cut off the other half’s excess. That’s just a portion of my “trim pile” after trimming them all.
Next up, organization. Lots of half square triangles, that frankly, look similar. I wasn’t using the same fabrics from the pattern, so I had to make sure I didn’t put something in the wrong spot.

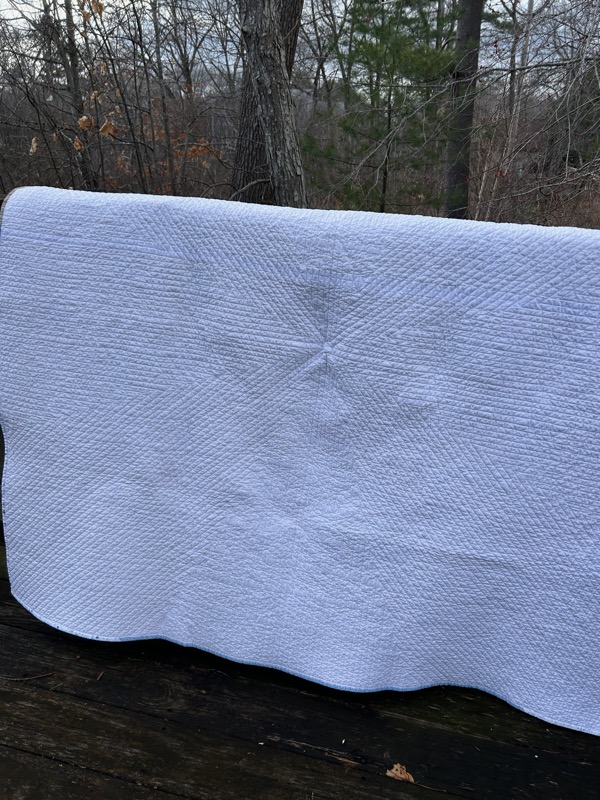
Finally ready to put it all together! It actually wasn’t too bad, or at least easier than I feared it would be. Next up was quilting. As this was a gift, I wanted my best quilting. For me, that means straight line quilting. Normally I would have just done straight across, or up/down. Maybe even diamonds. But the pattern is a giant snowflake, so I wanted to emphasize that. So I made my life harder, by coming down the center, then turning and going up at a diagonal. Also due to the size of the blocks and other considerations, I decided spacing should be every 1/2″. It took a very long time and was very tedious since I couldn’t just mindlessly zip across the quilt for each line.
Frighteningly, one of the very first quilt lines I sewed, I got some sort of stain or marking on the top. Possibly sewing machine oil? I should never (and probably will never) make a white quilt again. It was very demotivating to keep seeing that spot every time I came near the center of the quilt. Plus it was on a BLUE fabric, so I couldn’t even spot bleach it out. Anyway, I persevered and thankfully, it came out when I washed the quilt.
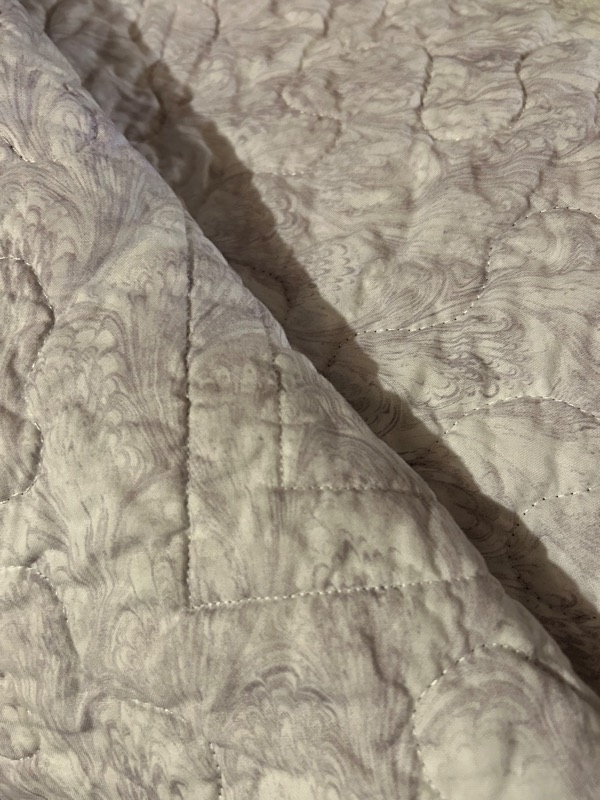
I used leftover colored fabrics from the quilt for a scrappy binding. I had a swirly white fabric for the backing.
All in all, I LOVE how it turned out, and wistfully put it in the box to send to my friend.


-
SSWP – Covered in Adventure

See my previous post for the explanation of Scrappy Sewing with Patty (SSWP).
The first official pattern released was Covered in Adventure. Lucky for me, prior to joining SSWP, I had started a challenge to declutter my sewing area, which included “processing my scraps”. Processing your scraps basically means taking leftover fabric from other projects and cutting it into useful shapes for future use. Rather than having an odd-sized blob that you’re hesitant to use, you cut it down to commonly used sizes and shapes. For me, I started cutting up a lot of my scraps into 2 1/2″ strips. Tons of patterns use 2 1/2″ strips thanks to the popularity of jelly rolls. Plus I use 2 1/2″ strips for my bindings. AND I’ve been making a bunch of “chips”, 2 1/2″ x 4 1/2″ rectangles, for a future scrap quilt.
Then SSWP was announced, including a cutting guide for the upcoming patterns. Lots of various rectangles with 2 1/2″ widths. And of course, the bonus pattern, which I modified to work with 2 1/2″ strips.
That brings us to Covered in Adventure!

All scraps from my 2 1/2″ bin! Including the scrappy binding. I had just enough of the blue for the horizontal rectangles to give it cohesiveness. Scrappy binding of course. And the backing was made from fabric that was given to me some time ago by a family member.
I did my “go to” quilting, which was matchstick straight lines with my walking foot.
Finished size: 60″ x 40″
-
SSWP – Covered in Intrigue
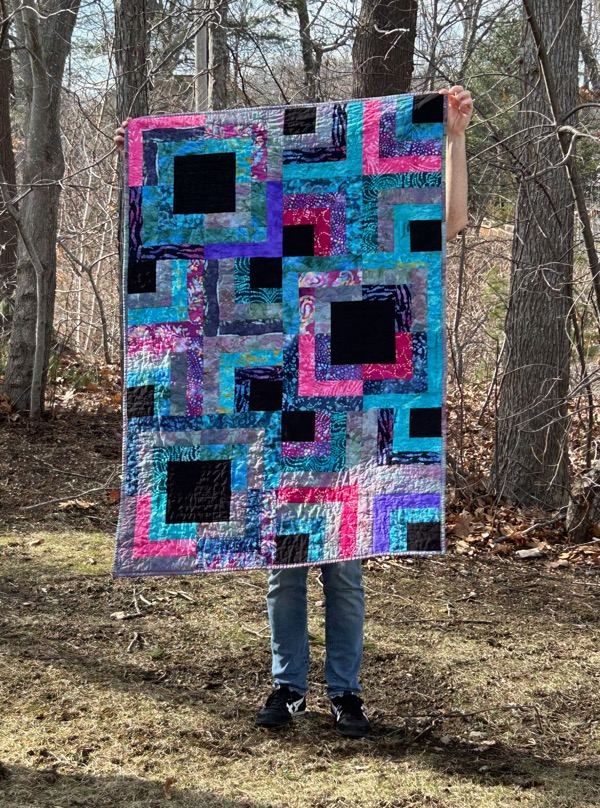
SSWP = Scrappy Sewing with Patty, for Project Linus. Having recently completed my challenge to make and donate 50 blankets to Project Linus, I thought I was done with donation quilts for a bit. (And in fact, have made a few quilts for family members and myself!). But then Project Linus announced a new fundraiser! Scrappy Sewing with Patty! When you register for the event, the donation amount benefits Project Linus, and you get 7 patterns released every couple of weeks from April to May. Enough people registered, that they also released a “bonus” pattern to start.
Covered in Intrigue – the bonus pattern

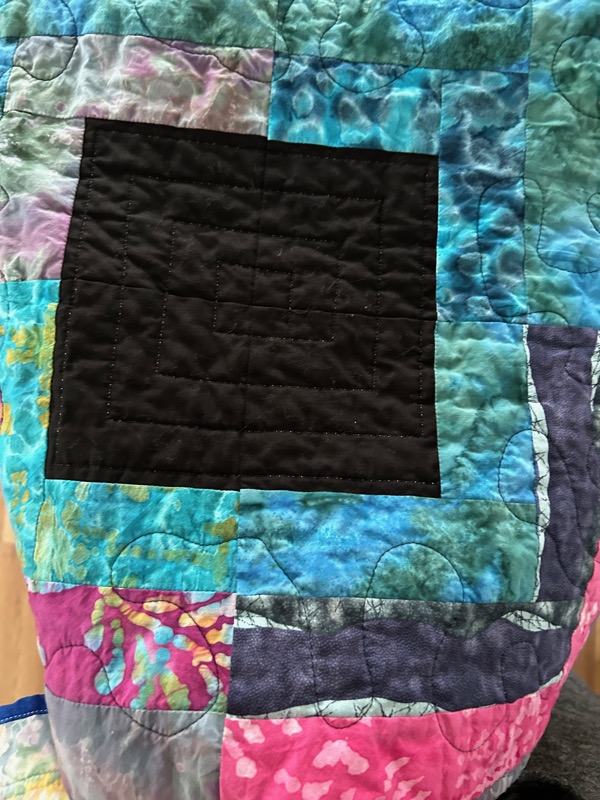
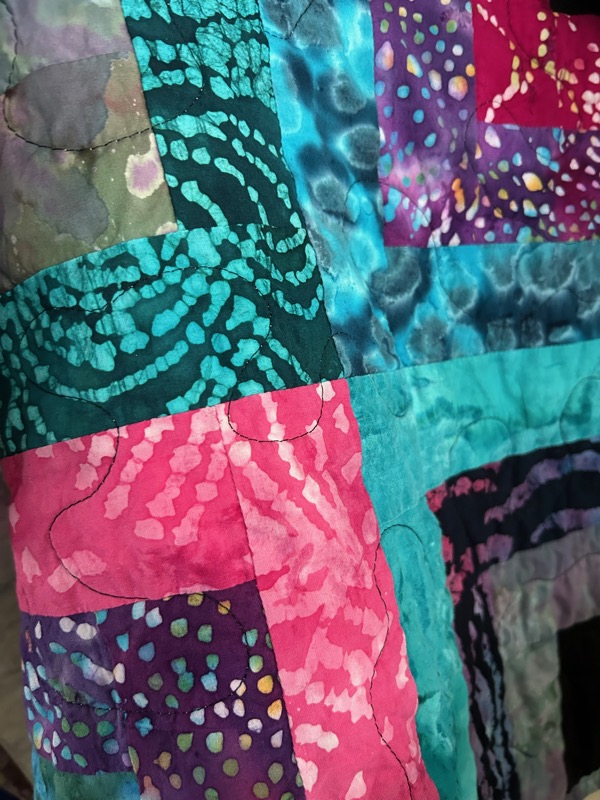
The bonus pattern included 2″ strips, but since these patterns are meant to be scrappy, and my stash has LOADS of 2 1/2″ strips, I re-did the math to work with 2 1/2″ strips. As I was going through my strips, I realized I had a batik jelly roll that would work perfectly with this pattern. I supplemented with a few other batiks I had in my scrap stash. It’s a very cool pattern that really changes the look of the quilt based on how you arrange the blocks. I liked this version of it where some of the areas seem to come forward and others push back.
I machine quilted with a meander on most of the quilt, but did a spiral square inside the three large black squares. I also managed to use some more “frankenbatting”, meaning left over pieces of batting that I stitched together. Binding was more of the scrap batik. It went together pretty quickly, especially using already made 2 1/2″ strips. The backing was one I had leftover from other quilts.
Finished size: 60″ x 40″
-
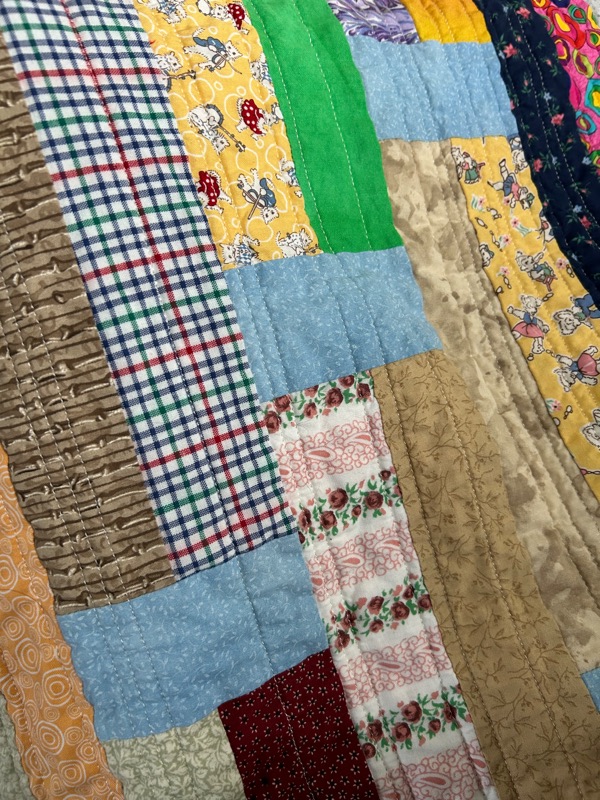
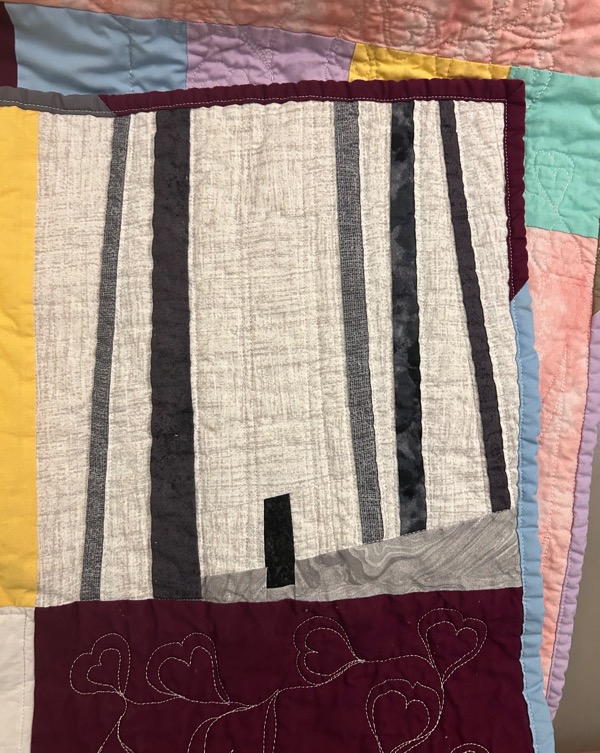
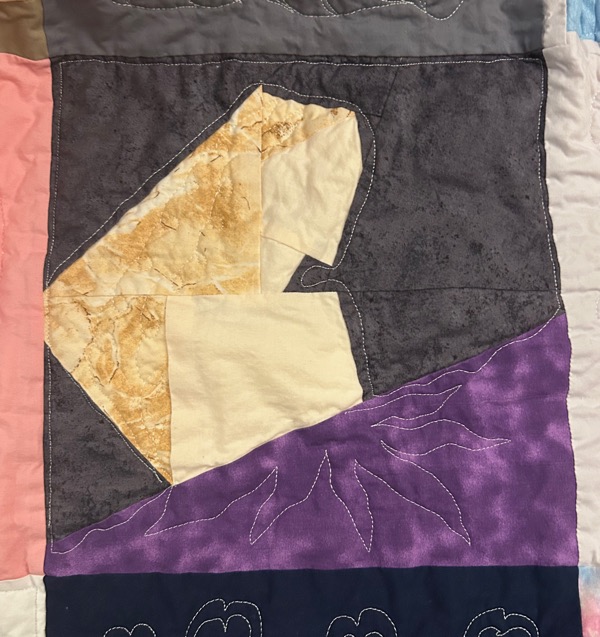
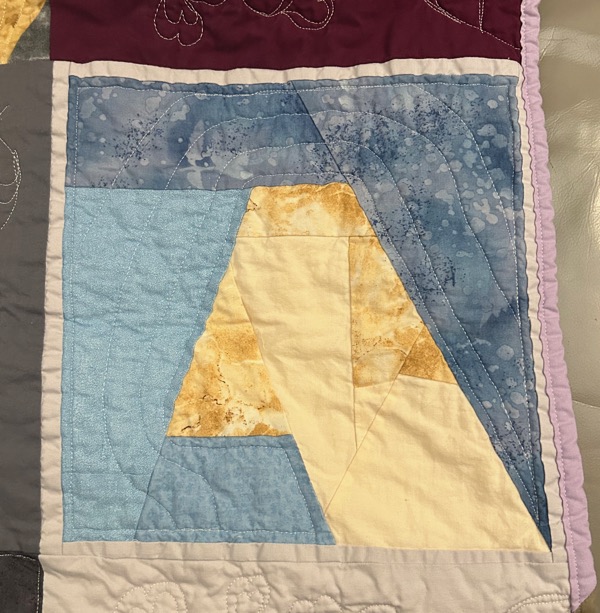
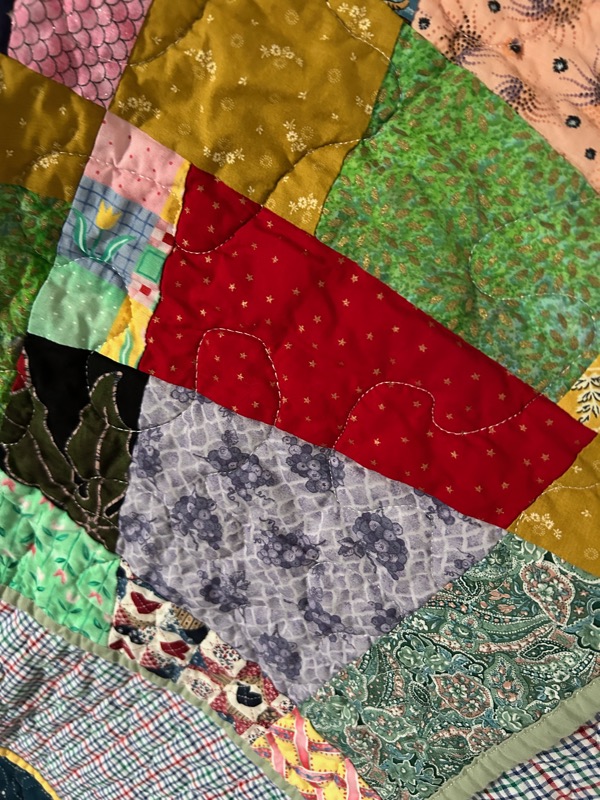
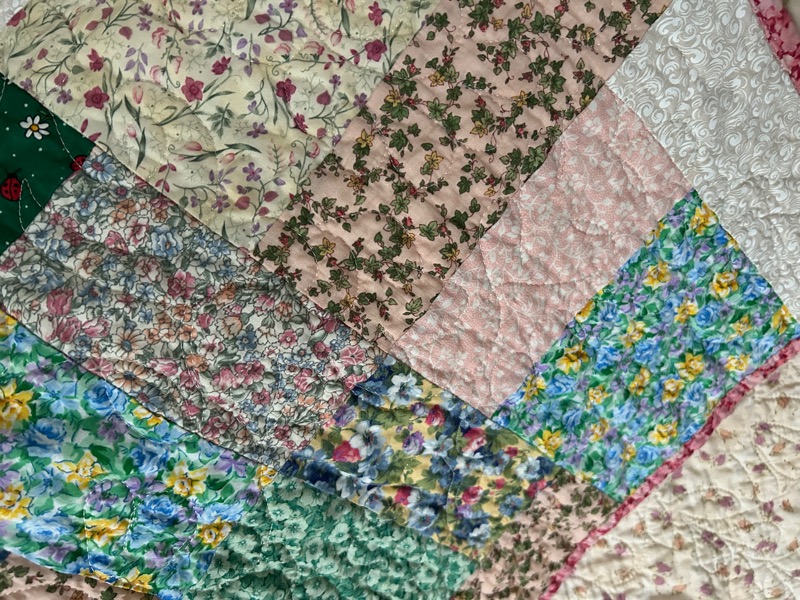
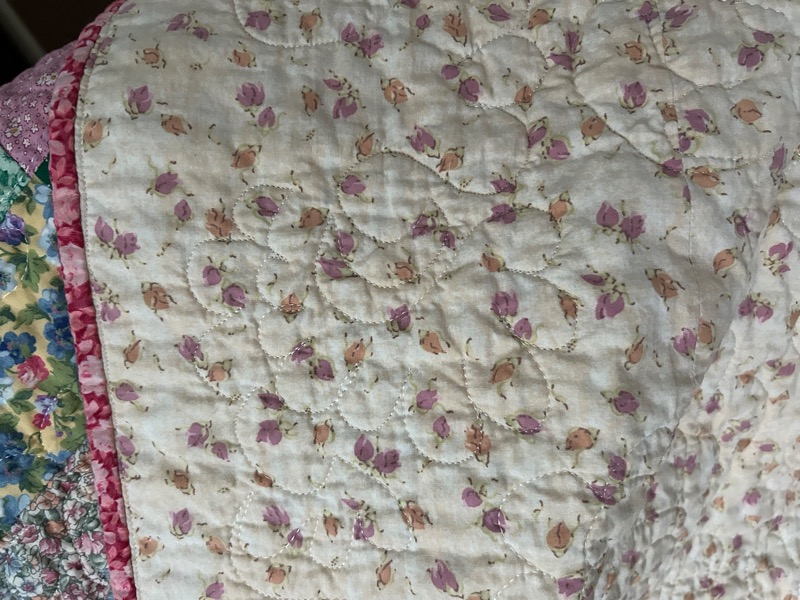
One for myself!

I finally made a quilt for myself. It’s a scrappy string quilt. It includes scrap fabrics from clothes I made for my kids when they were little. It includes scraps from when I made masks during the pandemic. Of course it includes tons of scraps from quilts I made for Project Linus. It’s a lovely walk down memory lane whenever I look at it.
The batting was even from scraps as I sewed together leftover pieces making a “Frankenbatting”. And naturally, the binding is scrappy as well!

The only fabric I bought for this was the backing, well, part of the backing. I included a chunk of fabric that was leftover from another project. The piece that I bought had mushrooms on it and I couldn’t resist it when I was at the store. Photo above shows some of the backing and binding.
I made the blocks by taking an 8″ square piece of paper and laying down a strip of fabric that was long enough to go corner to corner. Then I laid down another piece on top of it, right sides together. Sew, flip it over, keep adding strips. I went with a “wonky” version, meaning I didn’t at all make sure the strips were straight or that I was sewing them on straight. Once it was all put together, I ripped out all the paper.
I had originally started this quilt with the intention of donating it, but as I remembered each fabric, I couldn’t bring myself to part with it.


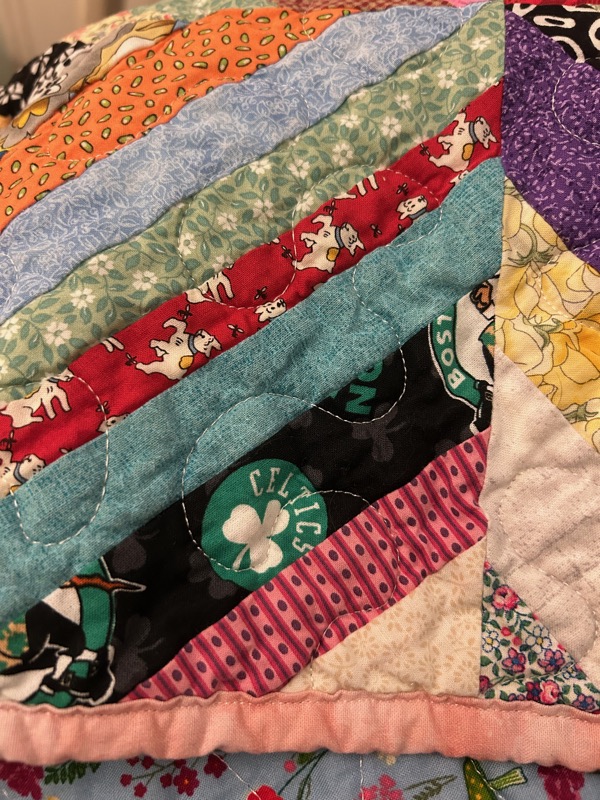


Some close ups for the fabrics. Clearly, cat approved as she found it safe enough to hide under. And the bottom right photo shows an accidental perfection. I attach the binding to the back first, then flip it around to the front and stitch it down. I couldn’t have possibly lined up the grey and green like that if I tried!
Finished size 64″ x 64″.
-
Taylor Swift Quilt

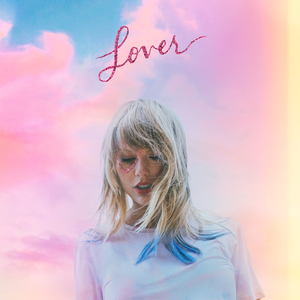
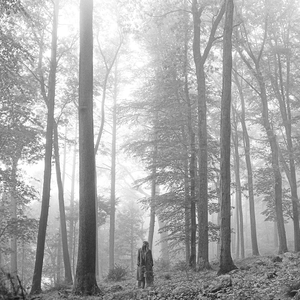
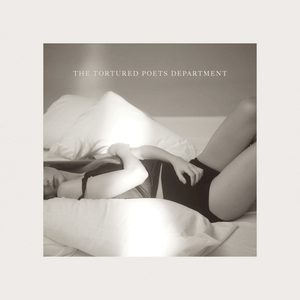
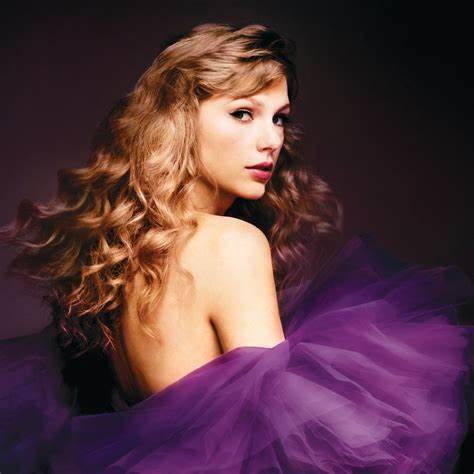
I haven’t made my kids a quilt since they were babies. I saw a cute crochet idea, where someone made squares with the colors that represented their favorite albums. I thought why not do that as a quilt? Then I thought, why not paper piece and do more than just the colors? My daughter loves Taylor Swift, so I got to work figuring out how to make my own paper piecing patterns. I ended up using the Quilt Assistant software, which made it much easier! So the blocks ended up being album covers, and solids of the Eras colors.
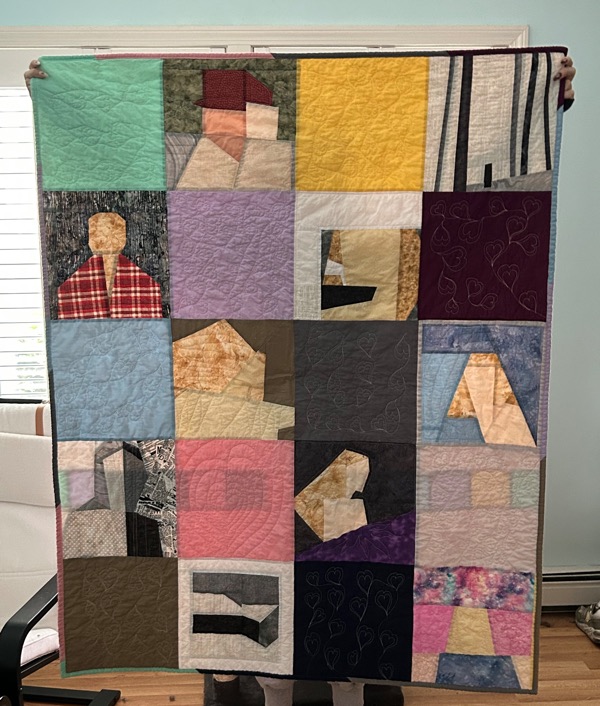


Because of the sunlight behind the quilt, you can actually see a bit of the back (you can’t in normal light). Which was a stripe of blocks of eras colors on a dusty pink background. I bought probably 75% of the fabrics new, but some were from my stash including the newsprint for Reputation, which is probably my favorite!
The actual album covers for reference:


-
Subtly Celtics

Having finally finished my blankets for Project Linus, I have a few projects in mind to make for loved ones. The first one I’ve finished is this one:

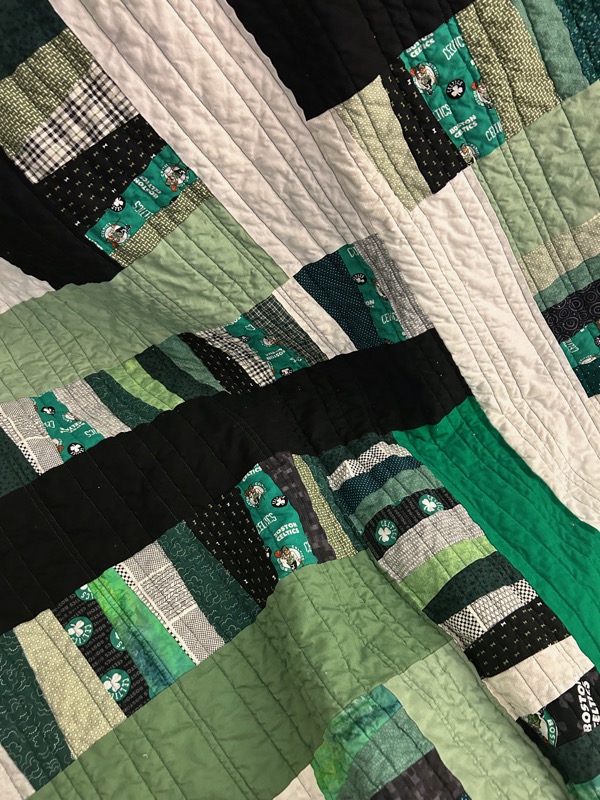
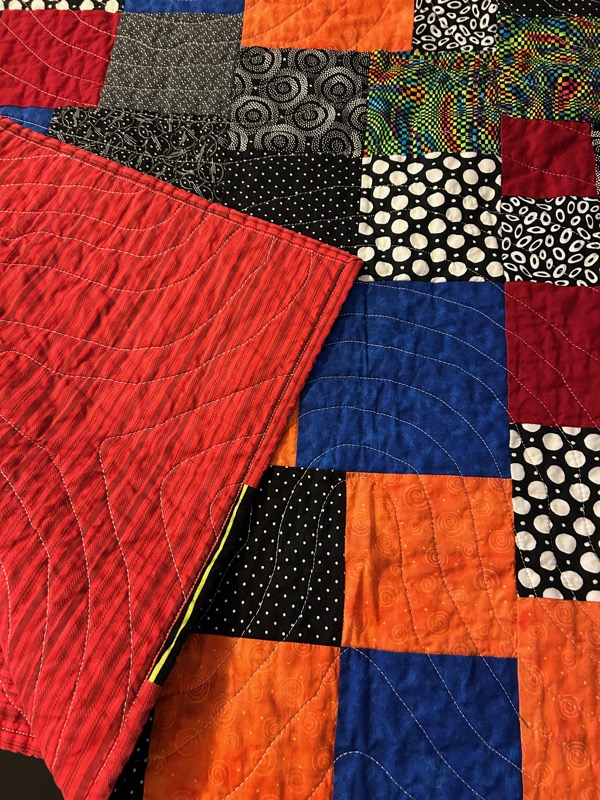
The pattern is Garland by Suzy Quilts. I wanted to create a Celtics quilt for my boyfriend (as a birthday gift) who is the world’s biggest Celtics fan. But I also didn’t want it over the top, in your face CELTICS. This pattern is perfect, since it has the “improv” strips, I could use a few Celtics fabrics sprinkled in.
I had a leftover strip, so I used it in the backing. I almost love the back more than the front. Ha! I quilted with moss-colored thread in varied width parallel lines on the diagonal. I was a bit nervous to wash it the first time with the black next to the white strips, but success! It didn’t bleed.
My boyfriend often assists with photos by holding the quilts. So I asked him to hold this one up. I was going to then say “Happy Birthday!”, but before I could he said “I like this one, can I have it?”. And that was before he saw the front or even noticed the Celtics fabric. So I guess he likes it. 🙂
-
50 for my 50th – part 5

Part 1 (first ten quilts), Part 2 (11-20), Part 3 (21-30), Part 4 (31-40)
Blanket 41! December 3, 2024


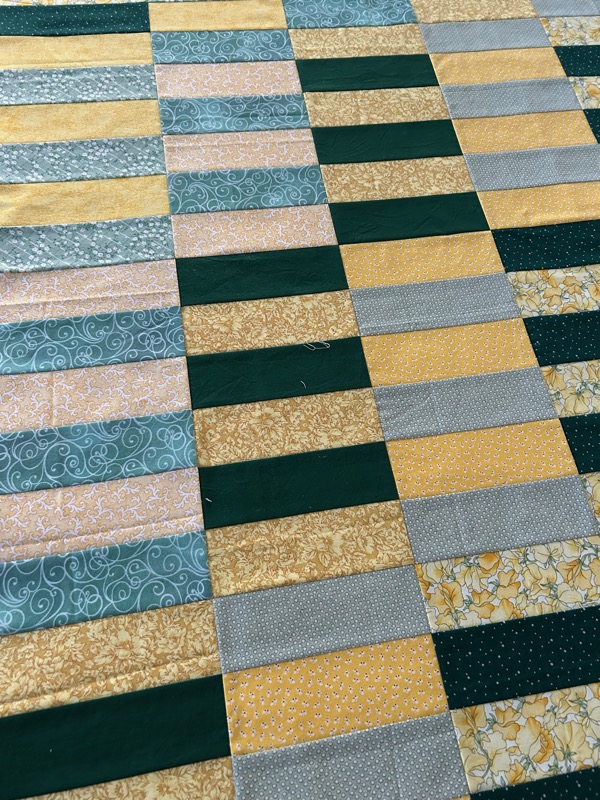
I’ve made this pattern a few times, Fat Quarter Shuffle by Cluck Cluck Sew. I had a bunch of plaids and stripes that I found difficult to coordinate with other fabrics, so I figured I’d just do a plaid quilt! Of course when cutting out my first blocks, I accidentally cut the block an inch narrower than the pattern called for. Soooo I added the grey stripe to get the quilt back to the right width and cut all the other blocks one inch narrower. I actually love my happy accident and how the stripe looks. I love everything about this quilt and was so tempted to keep it for myself. Another one with backing from fabric given to me by Project Linus. I quilted it in varying width horizontal and vertical lines, my thinking is that it mimicked a plaid pattern.
Finished size: 48″ x 56″
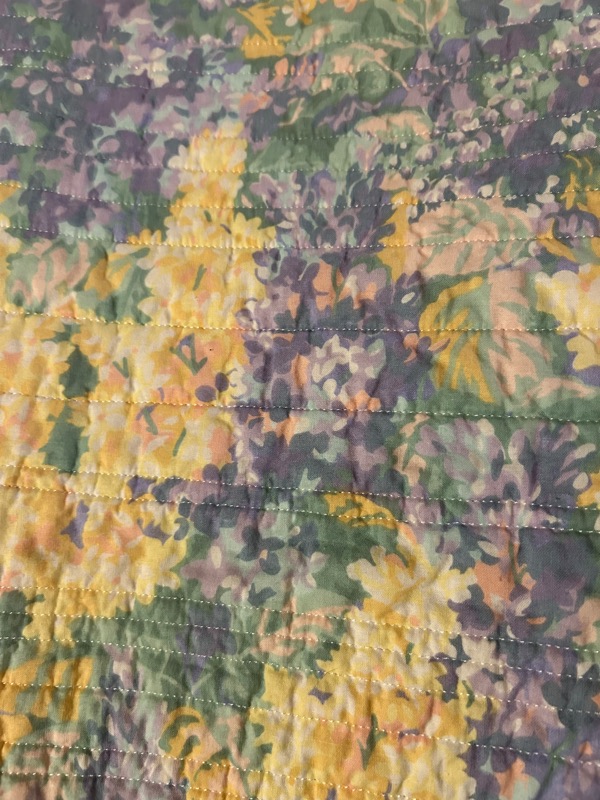
Blanket #42! December 4, 2024


Completed a day after #41, this took me more than a day in total, but I had worked on several quilt tops at once, then got them all ready for basting, only to run out of spray baste. So I kept working on tops while I waited for the baste to arrive. Then I got them all basted, and began quilting and binding. So quilting and binding this quilt took me an evening, making it finished just a day after the last one.
This is another Cluck Cluck Sew pattern (I obviously love her patterns), this one is Fat Quarter Friday, in the second variation. Recently I finally got around to organizing my fabric. It had been somewhat organized by color, with some fat quarters in a separate pile. It’s now organized first by size of cut: fat quarters, 1/2+ yard cuts (meaning it’s at least a half yard, but not a full yard), 1+ yard cuts, 2+ yard cuts. Then by color. In doing so, I found many of these floral fat quarters. Not really my color/vibe, but I thought they’d make a great quilt. I added in some “neutrals”. Well, I love it. The fabrics came together very well, including the backing fabric and binding fabric that I found in my stash and were much easier to find when I could just look in the right size, then find the right color. My basement really is my very own quilt shop.
Finished size: 48″ x 60″
Blanket #43! December 4, 2024


I saw “Just Get It Done” Quilts recommended on Reddit, and saw several “stashbuster” patterns. My favorite thing! Also, the theme of the channel is right up my alley, with lots of simple/quick tips and patterns. This one is “stashbuster #7”. Again, super easy to find a backing to use now that my fabric is organized.
Finished size: 37″ x 48″
Blanket #44 – December 25, 2024

I promise it’s actually straight, it was a windy day and crochet doesn’t hold it’s shape when held up. This one has been a work in progress for a while. First because I hate the yarn. I had ordered it online after loving other colors in the same yarn. It actually doesn’t look awful in this picture, aka from a distance. Close up, it reminds me of this cup:


Then I tried a few different stitches and I think it took me three tries to end up with this one, which gives it the two ribbed rows repeated. I put it aside as I was busy quilting a bunch of blankets, and quilting goes much faster. However, my kids were home from college and I was spending more time in the living room and less time secluded away in my basement (aka sewing area), so I pulled this out and completed it on Christmas Day.
Finished size: 80″ x 54″
Blanket #45 – January 2, 2025

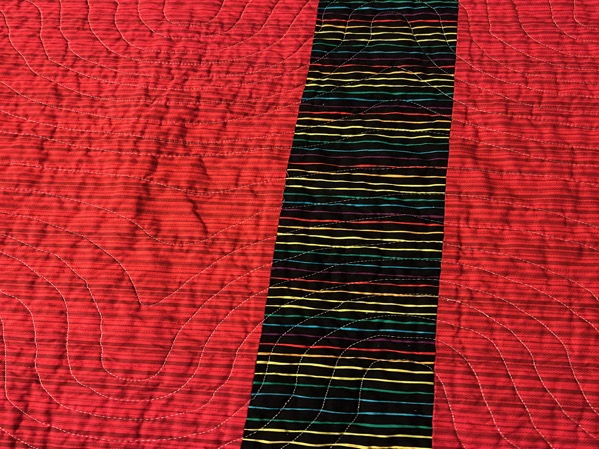
This is Fat Quarter Friday again, the pattern used in blanket #42, however it’s a different variation. While cleaning out my basement, I found an old quilt template (used to mark the quilting pattern) and I played around with it. It looked kind of cool, like topography lines. I also didn’t have enough backing for the entire quilt, so I added this black and rainbow strip to the back and really love how it turned out.
Finished size: 60″ x 45″
Blanket #46 – January 4, 2025


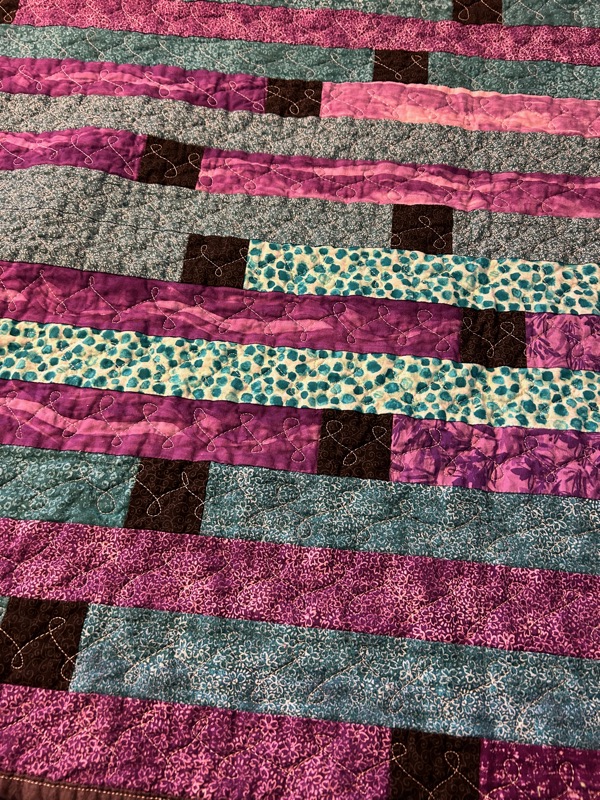
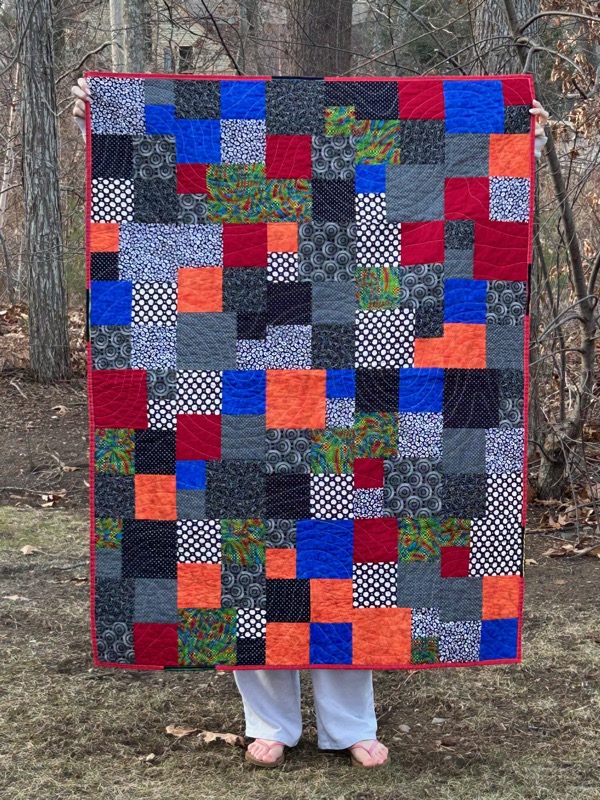
This was my first “Jelly Roll Race”. You can buy fabric pre-cut into long strips and in coordinating patterns. Then you sew them end to end. You halve the long strip and sew the halves together, repeat, and boom, a quilt. I saw a variation that added squares between each strip, I liked the look of that, so that’s what I did. I’m honestly not a fan of jelly rolls. The fabric never seems consistently cut and tends to be more hassle than it’s worth. A grey day outside and overly “warm” lighting inside, I’d say the colors are somewhere between the first and fourth photo. The blues were more teal, and the purples were purple, not fushia.
I decided to have a little fun with the quilting make these loops across each row. I also pieced together the backing with about 65% of it being the blue/grey wavy stripes and the rest being the mottled grey. Really like how it all turned out.
Finished size: 60″ x 52″
Blanket #47 – January 5, 2025

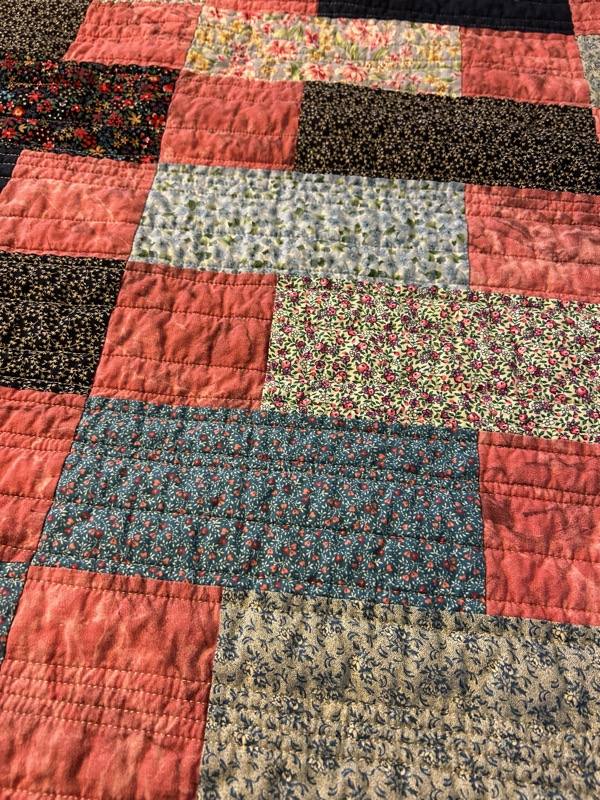

This is another one where the colors aren’t quite right in the photos. The pink squares are more of a dusty rose or mauve color. Closest to the middle photo. The pattern is a free one from Jordan Fabrics, called Boardwalk. I adjusted it down however to throw-sized. If I do this one again, I’ll recalculate the sizes to make better use of the fabric, this one had a lot of leftover pieces.
Finished size: 65″ x 46″
Blanket #48 – January 8, 2025
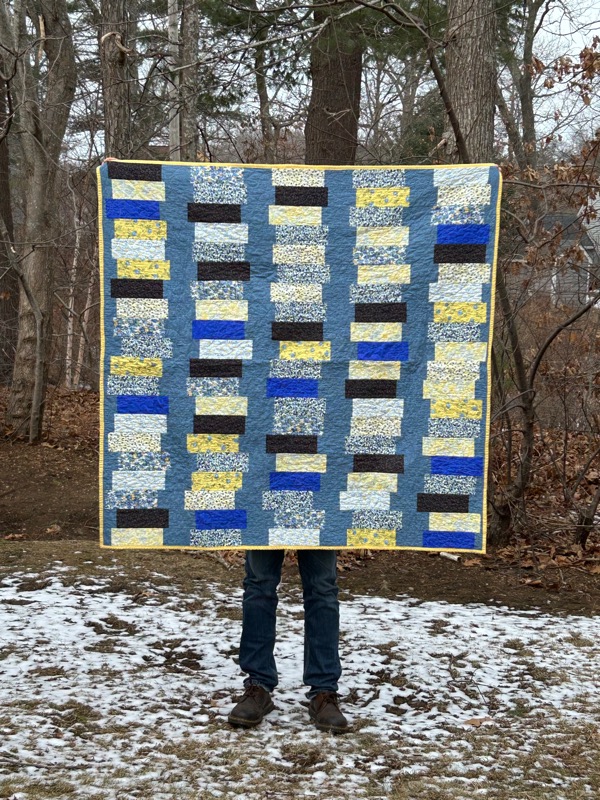


This one is a free pattern from Jordan Fabrics called “Balancing Act”. When I first saw it, I wanted to make it like stacks of books, but finding a good background and fabrics that looked like books was not going to happen out of my stash. This one was relatively easy to make, sort of like a simple “beginner” bargello quilt. I cut down the size from the pattern to 60″ x 60″. Did a meander quilt to break up the straight lines, also since the block placement meant there wouldn’t be a very good guide for vertical lines and it already had a very horizontal line that I didn’t want to emphasize with quilting.
Blanket #49 – January 9, 2025
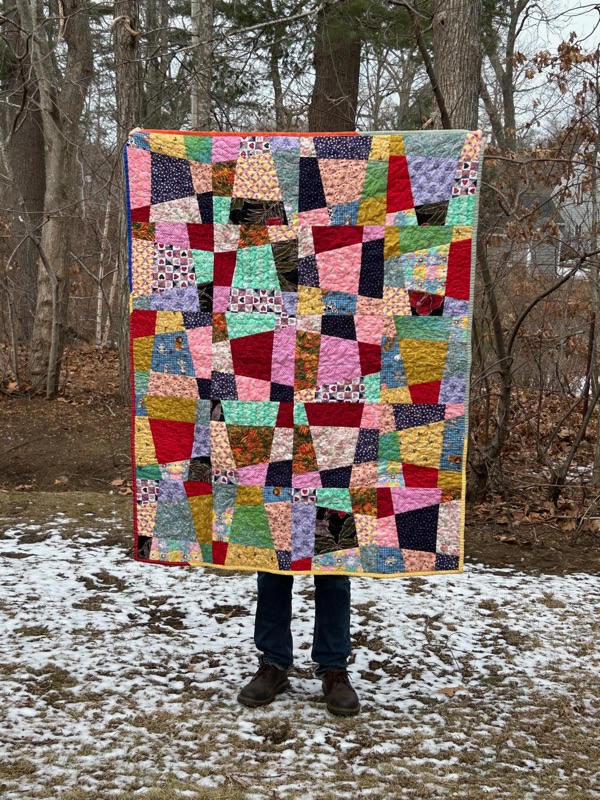
This pattern is from Just Get It Done Quilts and is called “The Ugly Quilt”. You use those fabrics that you just don’t love. Having made so many quilts lately, and mostly only from my stash, I know exactly which fabrics I keep passing over. Which ones just don’t seem to work with anything else. Even though I may like them, I just couldn’t get them to coordinate with anything else. Then it’s kind of like a stack and whack, except you whack them all the same. It goes together very quickly. And while it is “ugly”, I still like it. Meander quilted.
Finished size: 60″ x 48″
Blanket #50!! – January 13, 2025


For my last quilt (!) I went back to an old standby, the Yellow Brick Road pattern. Pulled several pink, green, and blue florals from my stash. I also bought some new quilting stencils and tried them out. I don’t LOVE the way they work, but if I want to be fancier than straight lines or meander, they are an option.
Finished size: 64″ x 46″
And with that, I’m done! Having started before my 50th birthday in the fall/maybe late summer of 2023, I had challenged myself to be done by my birthday that November. My expectation was that I’d create 50 BABY blankets, only to discover that my local Project Linus really needed “teen sized” blankets, often twice the size of a baby blanket. My challenge has taken quite a bit more time than expected. But I’ve done it! 50 blankets for Project Linus. 25 have already been donated and the second 25 are in bags on my sofa, ready to go.
While working on these blankets, I’ve joined groups of other “blanketeers” and see various thank you notes and stories of children (0 to 18) and their parents who appreciated these “homemade hugs”. I’ve heard from a couple of my friends that their kids were recipients of Project Linus blankets. I had one mom who found me via social media thank me for the blanket her son received.
I’ve tried to keep track of expenses, and I think I spent just over $1,000 on supplies. Mostly backing fabric and batting, but also thread and basting spray. I tried to use my stash as much as possible, which I have whittled down very nicely. Quote from my boyfriend, “Now you have room to buy more fabric”.
The breakdown of the 50 blankets:
35 were quilts, 11 were crochet, and 4 were fleece.
27 were throw/teen sized, 15 were crib sized, and 8 were baby sized
I have no idea how many hours I spent. I’ve read that the “average” simple quilt takes around 25 hours, so a guess would be 875 hours on just the quilts. The crochet blankets took longer, and the fleece blankets took a lot less. So a very rough guess is over 1300 hours. If this was my job and we use a 40-hour work week, that means 33 weeks, or 8 months. Given that it’s not my job and I did this in my spare time, I guess I don’t feel so bad that it took me a year and a half.
I will continue to make and donate quilts to Project Linus, just not a set amount or timeline. 🙂 Hey, I may even be able to make my family some quilts. Or donate to other organizations.

I'm a geek and I make things


