-
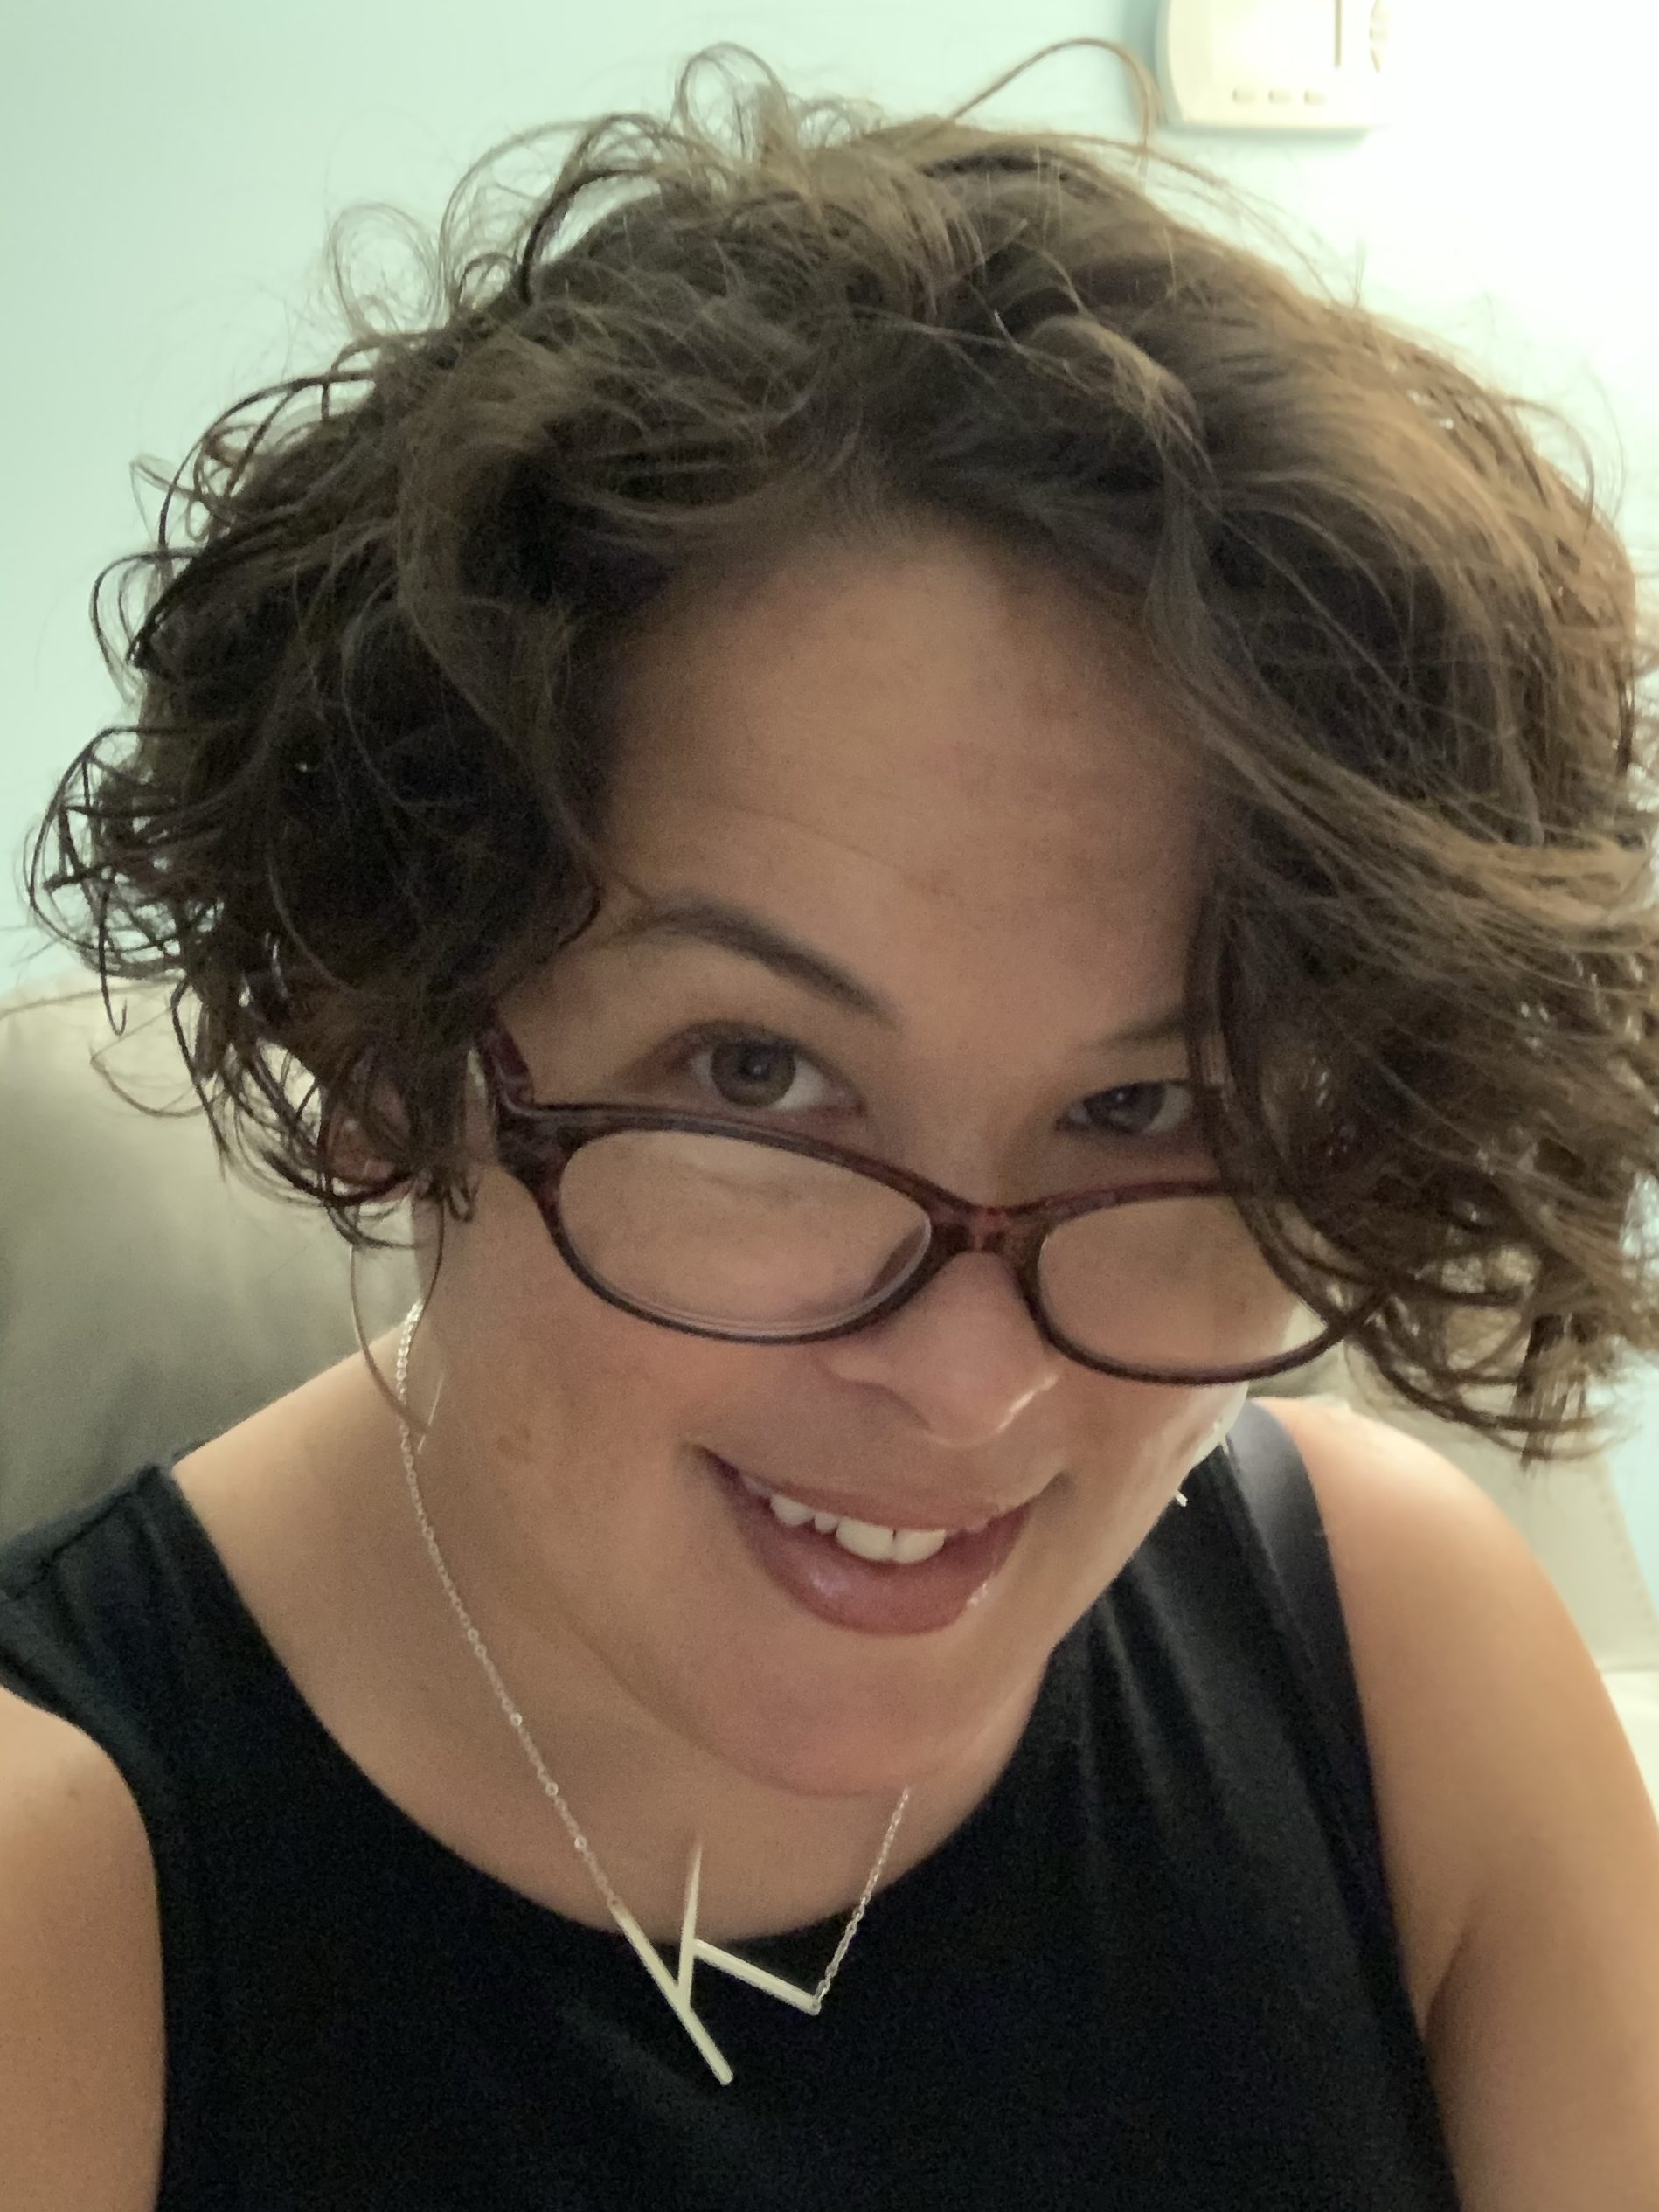
Kathy Eager Creative

Welcome to my site.
I’ve always been a creative person and need creative outlets. I sew, I embroider, I crochet, I paint, I take photos. You name it, I’ve probably done it.
Giving Back
I started my shop to create crochet dolls of feminist icons. As I created them, I decided I wanted to donate to related causes. For example, for each Ruth Bader Ginsburg doll I sold, I donated to the ACLU. I’ve donated over $200 to various organizations.
Then the pandemic hit and I made masks. For each mask sold, I donated one to a hospital or food bank. I donated over 300 masks!
Recently I’ve been painting landscapes and hiking-inspired watercolor paintings, and donate to the Mount Washington Observatory. Thank you to all of you for supporting me, and through me, supporting others!
Interests
I love hiking. Much of my inspiration comes from hiking. Be it paintings of mountains or crocheted mushrooms.
I’m a big geek. I love Star Wars and Doctor Who. I geek out on tech and gadgetry.
I’m a car person without being a big car person. Ha! I love my MINI Cooper, I autocross, I’m even a co-host on a car podcast, but I can never remember car models and can’t really do any car repair.
Where to find my stuff
At the moment, you can buy my art directly on my site, just by filling out the contact form below or on any of the posts you see on the site. Or you can check out my Etsy shop. Or for stickers and notebooks and such, check out my Redbubble shop.
Supplies
Want to support me and my creativity (besides buying my art)? Here’s a link to my BLICK arts wish list. Or like and follow on any of my social media accounts. Thank you!
-
50 for my 50th – part 4

Part 1 (first ten quilts), Part 2 (11-20), Part 3 (21-30)
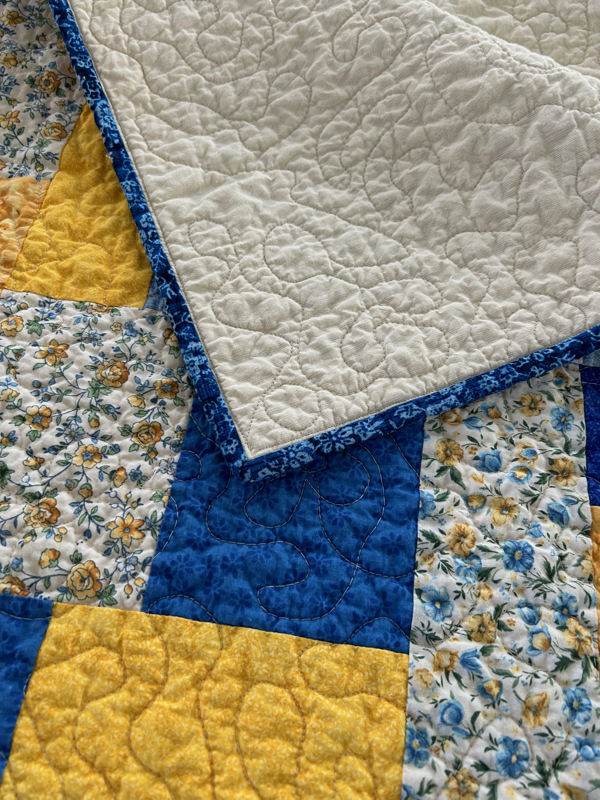
Blanket #31! October, 2024

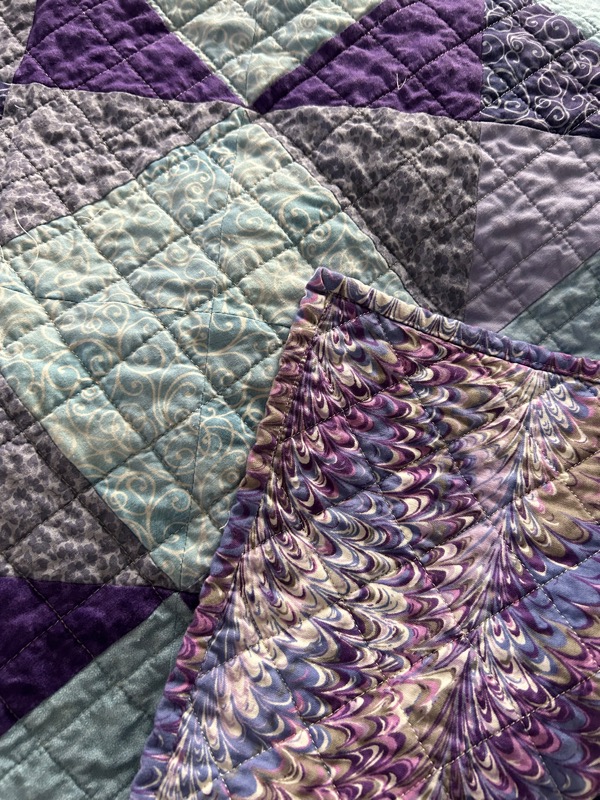
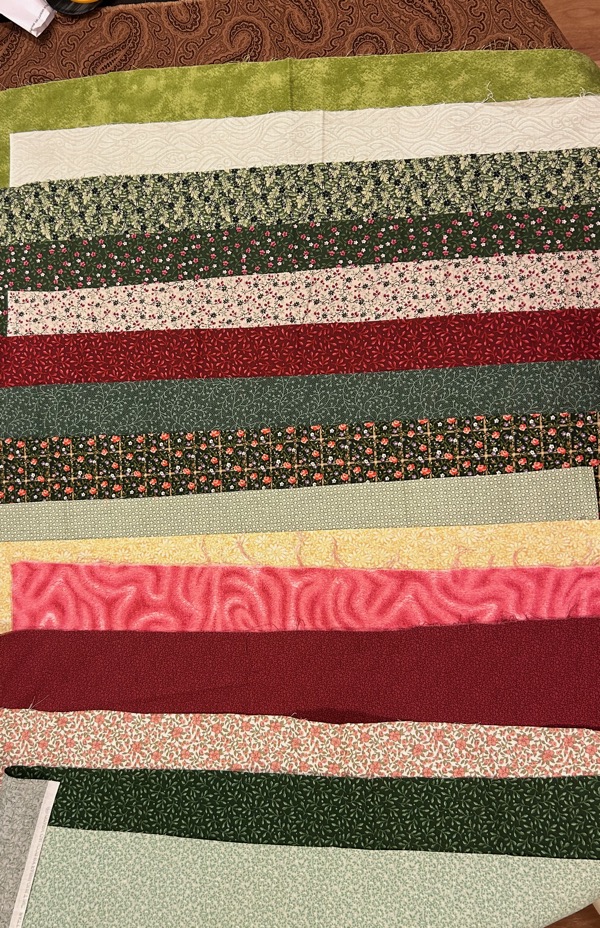
I saw a tiktok that showed how to quickly and easily make quarter-square triangles, so I figured I’d try it out. It was easier, but I still hate triangles. I’ve given myself permission to make some smaller quilts and get these babies done! So no pattern on this one. I made enough to make a baby/crib size quilt. I just happened to have this backing piece that worked perfectly with the colors I chose for the squares. Finished size 37″ x 28″.
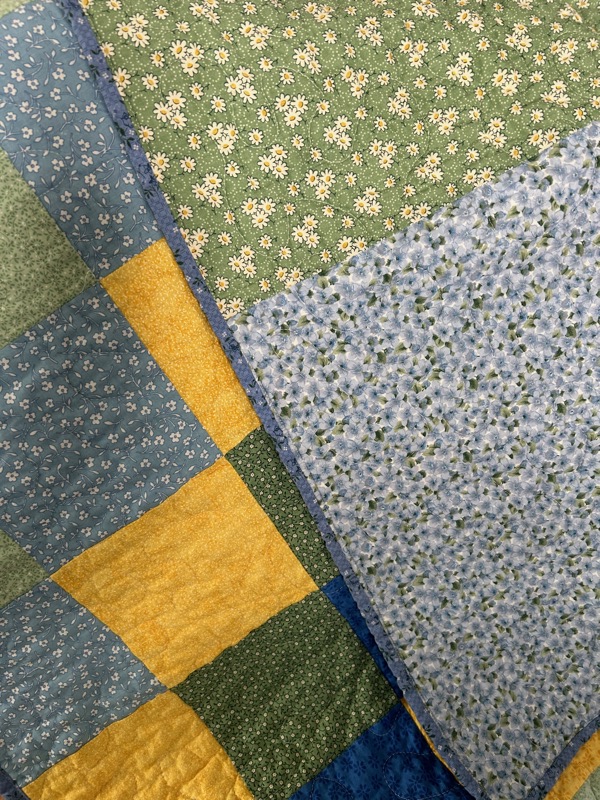
Blanket #32! October, 2024


While I was cleaning out my basement, I found a box. A box that apparently had more fabric. Some of the fabric was fleece. So I went to the Project Linus website where they had some suggestions for finishing fleece into blankets. I went with this 1″ fringe.
Finished size: 48″ x 64″
Blanket #33! October, 2024


I saw the pattern (Acadia by Modern Quilt Studio) for this quilt and immediately thought it looked like comic book pages. I happened to have some Marvel fabric, so I had to make this. I love how it turned out! I was also able to use some fabric I received from my local Project Linus chapter for the backing!
Finished size: 54″ x 44″
And in the midst of making these, I received a message on Facebook. A mom reached out to me. Her 3 year old son had recently been in a local hospital and had received a Project Linus blanket. Now that they were home (and he is doing well) she looked into Project Linus. I’m guessing she found our local chapter’s Facebook group, and saw her son’s blanket posted there, where I had said “I made those!”. She wanted to say thank you. Now normally I love seeing thank you notes for Project Linus blankets, but when it’s for a blanket I actually made… I think my heart may have exploded a little.
Blankets 34, 35, 36! November 4, 2024


Along with the fleece for blanket 32, I found this yellow fleece and this purple/blue/yellow floral fleece. So blanket 34, the yellow with fire trucks. I finished this with just a folded over mitered “binding”. Finished size roughly 40″ x 50″. I had enough of the floral fleece to cut in two and make two blankets. Blanket 35 I finished with a fringe. I won’t do that again, it takes forever and it’s very fiddly to make sure the fringe is long enough, but doesn’t cut the seam. Finished size roughly 55″ x 60″. And the second floral I finished with a folded over mitered binding. Finished size the same, 55″ x 60″.
Blanket #37 – November 18, 2024

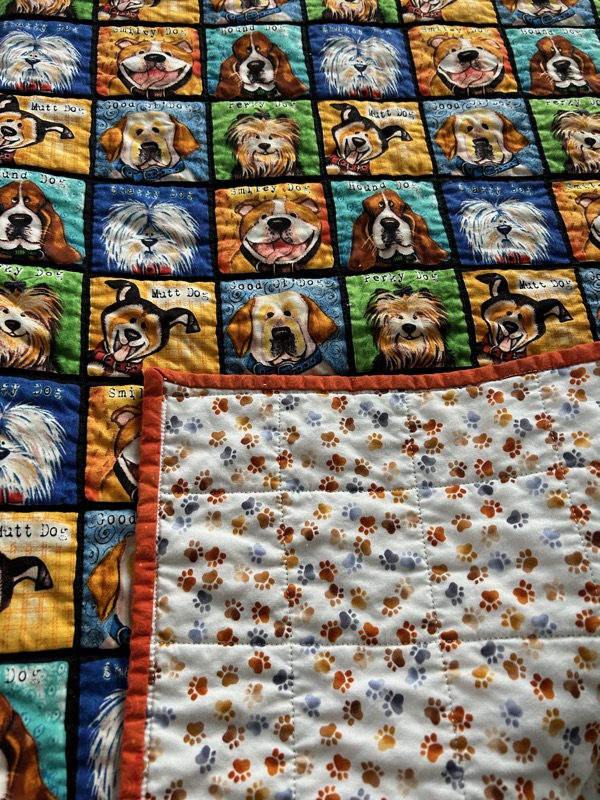
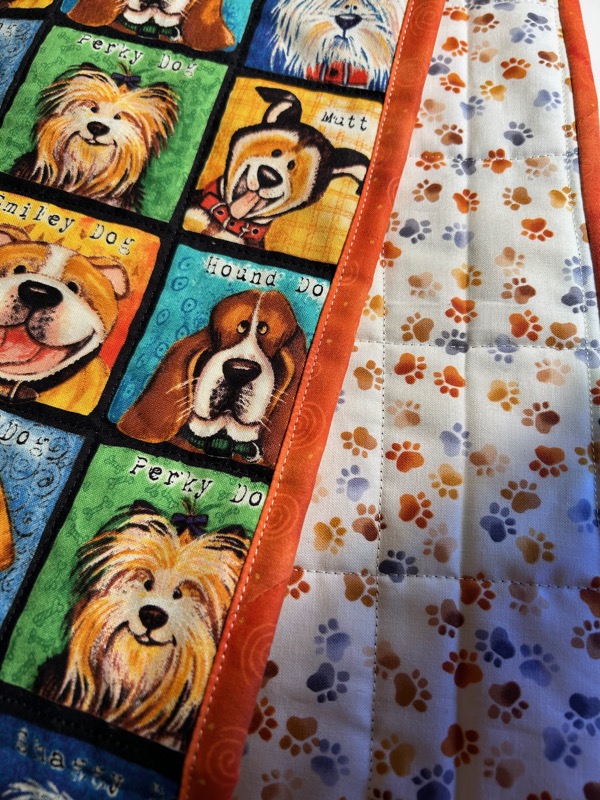

This one didn’t require any piecing. The fabric is a big panel of dog squares! Donated to me by a family member, with this adorable coordinating backing. I had the perfect orange for a binding. This one went together quickly since I didn’t have to piece it, and it’s much smaller.
Finished size 42″ x 38″
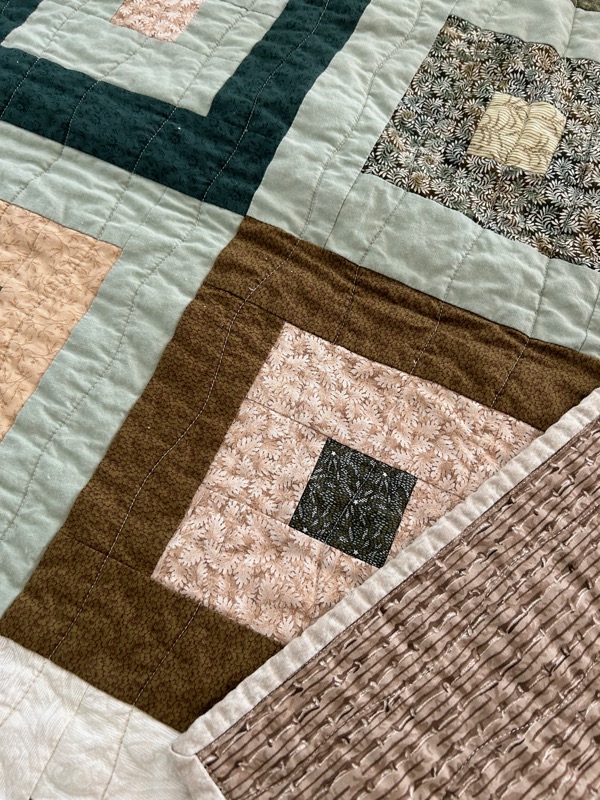
Blanket #38 – November 21, 2024


This one is HUGE. While cleaning and organizing my basement, I found another box of fabric. I’m pretty sure this was given to me years ago. It was mostly flannels, but I found this pieced top from the same family member who has donated other fabrics to my stash. In OTHER fabric from this family member, was a piece of fabric that was JUST the right size to back this big boy. I went with simple horizontal lines since I knew it would be tough to wrangle in my machine.
Finished size: 75″ x 60″
Blanket #39 – November 22, 2024


Again, while organizing, I found some old stuff, including stacks of these squares. I had started this quilt many many years ago. Several years ago, I stole some of the squares to make my daughter a bag. Luckily, I think I had originally planned for a queen size quilt, so I still had plenty left over to create this throw-sized quilt. Some of the squares had already been sewn into pairs, so I had to re-figure out how I had planned to put them together and hope I had enough to continue it. I did! The back however, I didn’t have enough of anything coordinating, so I stole a technique from blanket 28, which was to piece together big cuts. Blanket 38 has a binding made from leftovers from this blanket, and this blanket’s binding is leftovers from 38’s backing.
Finished size: 61″ x 55″
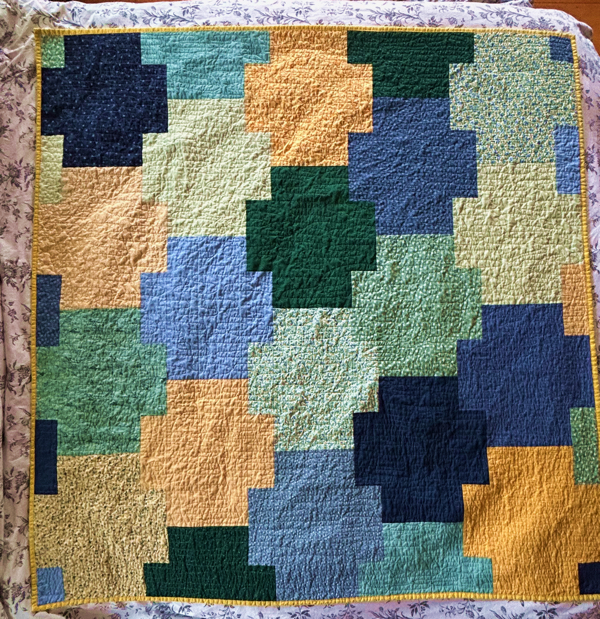
Blanket #40 – November 29, 2024


I really like patterns from Cluck Cluck Sew, and while reviewing the instagram account, I saw that she had a tutorial for this quilt. Not really a pattern, exactly, but a technique (which also had measurements and calculations for various sizes, so pretty much a pattern, but without exact fabric requirements). I loved the look of it, so I tried it out. It’s a tiny bit tedious in that you can’t just cut all the pieces in one go, but other than that, it’s pretty quick and fun to put together. If I do another one, I’ll do more offset squares, I think those make it look more modern. Also my “background” fabric I think turned out to not be 100% cotton (based on how it reacted to ironing), which was a bit concerning, but it turned out fine, even after a wash in hot water and full dryer. Backing fabric is from the bolt given to me by Project Linus!
Finished size: 41″ x 55″
-
50 for my 50th – Part 3

Jump to the newest quilt.
Here is part 1 where I explain what this is all about, and the first 10 blankets
Here is part 2 with the second set of ten blankets
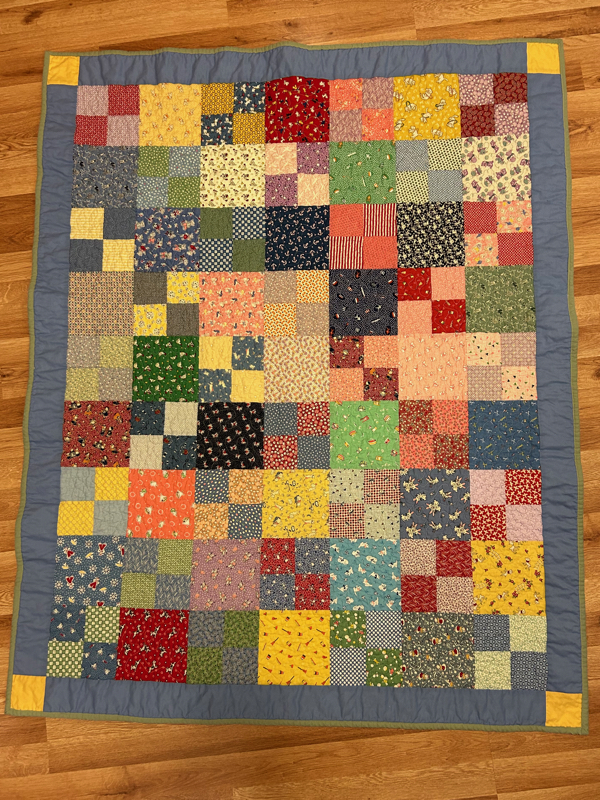
Blanket #21! July 13, 2024


The same family member that gave me loads of fabric, dropped off a pieced top and coordinating backing fabric. I just needed to put it together with some batting, quilt it, and bind it! I know she’s very meticulous, so I knew this top would be perfectly pieced. I did my best to quilt it and bind it as best I could. I’m happy to say on this, my 8th quilt that I’ve machine quilted and machine bound, I did a pretty great job. Look at that mitered corner! Beautiful! Bonus photo upper right was all that was left of the binding I made for this quilt. I played binding chicken and won!
Finished size: 44″ x 56″
Blanket #22! July 17, 2024


Another pieced top and coordinating backing fabric dropped off by the same family member. I believe she started this quilt top around 20 years ago. I was looking through my stash for a coordinating fabric to use for the binding. Lo and behold, in the fabric I bought in a box off of Facebook marketplace, the SAME EXACT BLACK FABRIC. Absolutely wild.
Finished size: 44″ x 56″
Blanket 23! – July 27, 2024

This one is big! So big, I couldn’t get the whole thing in the photo. The pattern was a free one from Fat Quarter Shop called Cobblestone. It went together pretty quickly, and was fairly simple to do, but I don’t think I’ll make it again. I don’t love the size of it and I’m too lazy to do the math to make it smaller. (But not too small, I don’t want a crib size).
I tried a new quilting pattern on this one, sort of a squished meander. I saw it somewhere else and thought it looked sort of like cobblestones. Not really, but that’s what my brain said, so it seemed fitting. It was harder to do than a regular meander, surprisingly. I ended up having to rip out some of the quilting and re-do it, something I’ve never done before. Then I messed up part of the binding as well and also had to re-do that.
Once again, I needed to buy fabric for the backing. I bought (hopefully) enough for four more quilts, $65.
Finished size: 65″ x 63″
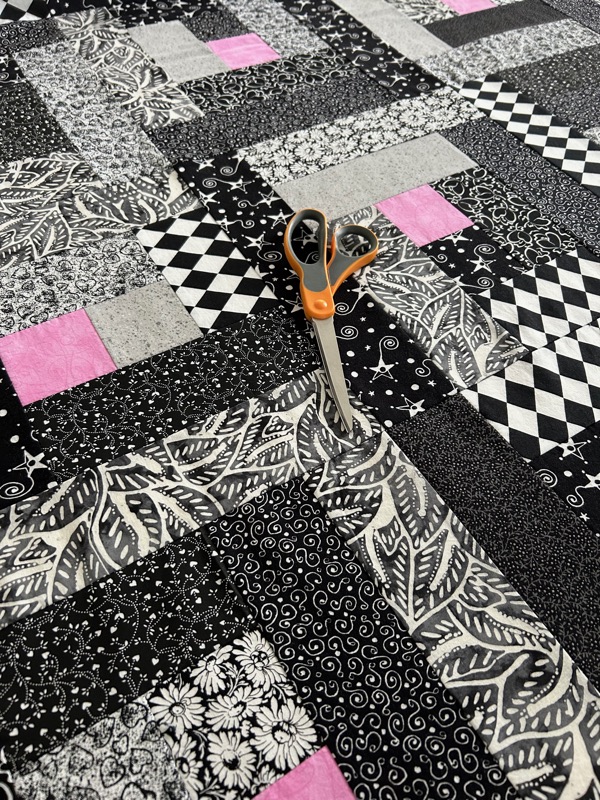
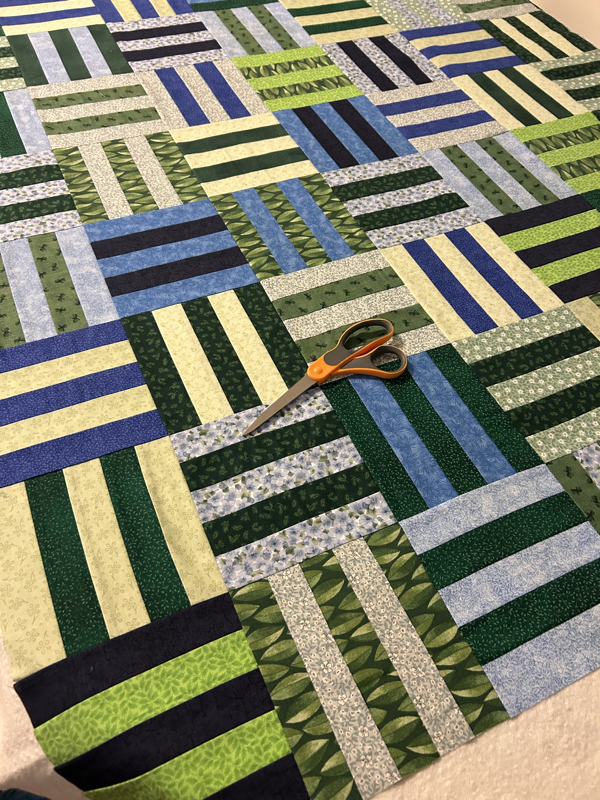
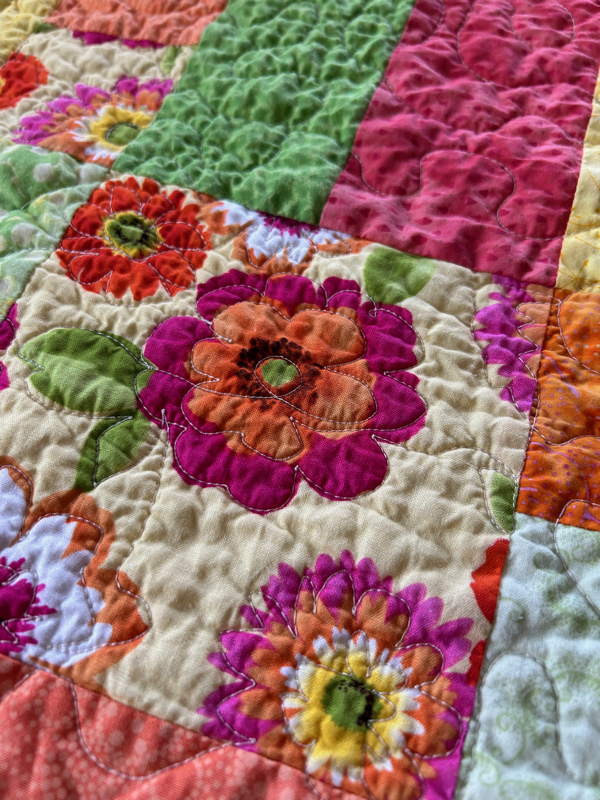
Blanket #24! – August 8, 2024


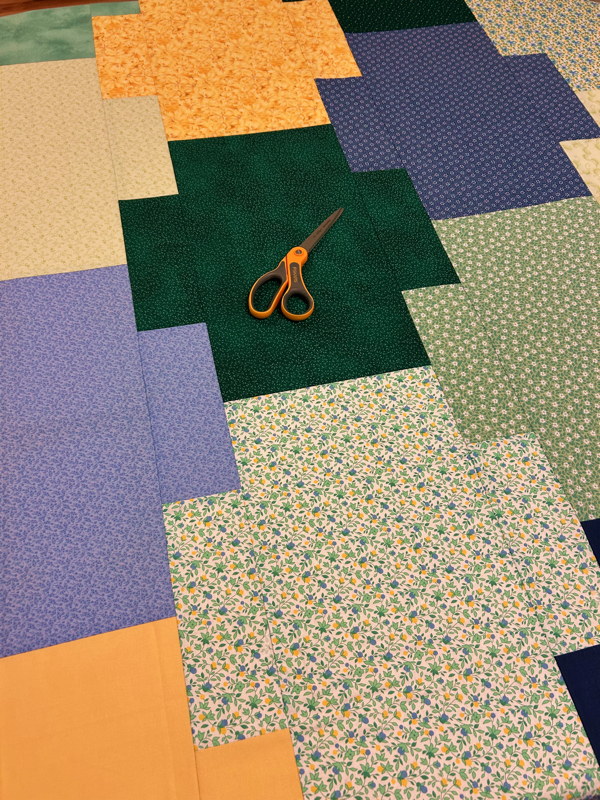
The pattern for this one is “Fat Quarter Shuffle” by Cluck Cluck Sew. Most of my stash is fat quarters and this one had a nice scrappy look, as well as looking pretty quick to put together. I had a fat quarter bundle that I wanted to use. First, there weren’t enough fat quarters in the bundle, I’d need to supplement. Second, the fat quarter bundle was very dated looking. I’m fairly sure it was from the late 90s and it looked very late 90s home decor. I needed to add some fat quarters for numbers, but I also wanted to add fat quarters to hopefully modernize the palette a bit. (The photo with the scissors is the closes to the true colors). I think I accomplished that.
The two upper left photos were just to show what I sometimes do to check that I have an even distribution of values, and not just colors.
I am really loving the pieced binding technique. It just adds to the scrappy feel.
This was fairly quick to put together, and I’ll definitely use this pattern again. Finished size 57″ x 70″.
I also purchased more backing and more batting. I totaled up what I’ve spent so far on this “free” project, and it’s a little over $900. Considering I had done some rough math and came up with around $100 in materials for the cost of a throw-sized quilt, and this is number 24, I’m doing pretty well only spending $900 versus $2,400. Gotta think positively, right?
Blanket #25 – August 20, 2024
Halfway!


I really need to improve my quilt photography skills.
Anyway, I had a love/hate relationship with this quilt. I went looking for some new “fat quarter patterns” and saw this one in several color palettes. I wanted to do black and white, then I wanted to do black and white and red. I bought the pattern. It was $12, which is a bit on the high side for a pattern, especially given this one isn’t particularly complicated. But I like to support pattern makers, and they do all the math for you. Often, they’ll have cutting and construction tips as well. This pattern didn’t have cutting or construction tips. And it had an error in the count of pieces. Not a fan, and not worth $12 unfortunately.
Then this red fabric. I bought it specifically for this quilt, in order to have enough for the middles, and the backing. I ordered it online and when it arrived, it had an odd sheen to it. It then proceeded to get red dye on my fingernails and the few plastic parts on my machine. I worried it would bleed onto the other fabrics when washed, so I made sure to wash it with THREE color catchers. Happily, it didn’t bleed.
After all that, I’m delighted with how it turned out. It’s precisely what I envisioned. Finished size 56″ x 70″.
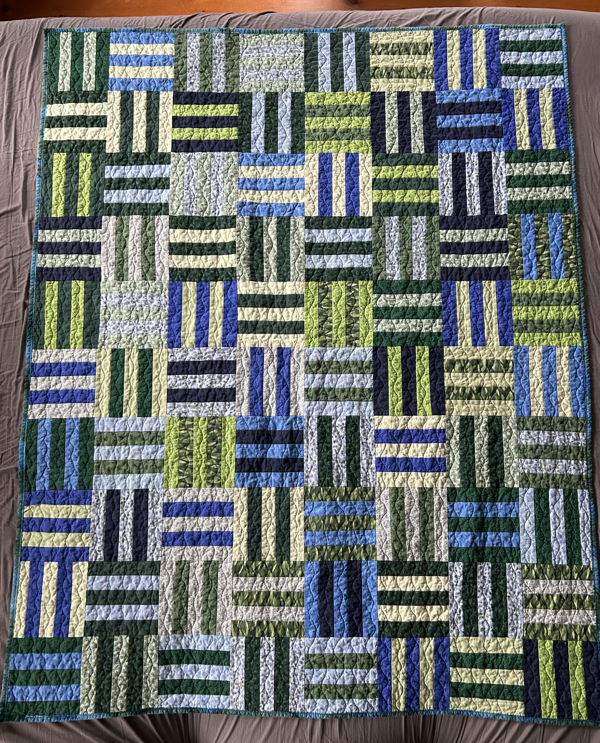
Blanket #26 – September 12, 2024

I selected the black and white fabric at the same time as blanket #25. I had planned to make the same thing, just with pink centers instead of red. However, after the love/hate issues, I decided instead to make a log cabin with the fabrics.


I used this free online pattern, which is great as it gives cutting instructions for fat quarters. I made the largest one with 3″ center squares. However, it assumes your fat quarters are a full 18″ by 22″, which many of mine are not. If I do this one again, I’ll probably do the 2.75″ one which leaves a little wiggle room for poorly sized fat quarters. Or do the math and make a 2.5″ one which will be loads easier to cut with my creative grids ruler. In any case, the pattern was well written and the quilt fairly simple to put together.
I did have one minor annoyance, which was that I ran out of thread halfway through quilting, so I had to set the quilt aside while I ordered more and waited for it to arrive.
Finished size 60″ x 60″
Blanket 27 – September 13, 2024
It took me longer than two days to finish, but as I said with the previous one, I had to set it aside while I waited for thread to arrive. So I started this one.

It’s the same pattern as blanket #24, but with very different fabrics!


Again, I try to use up as much stash as possible and not buy new fabrics. That can be difficult for backing since I generally need around 3 yards. I happened to have close to that leftover from blanket #19. I measure the top, I measured the fabric. In general, you should have enough backing fabric for at least a few extra inches all around, it can bunch up during quilting or shift around. Based on my measurements, I wouldn’t really have that extra buffer. I’d have to be careful and lucky to make it work.
I was very lucky and I won at “backing chicken”. I went on to the quilting subreddit and showed off. How quickly I was brought back to earth as I lost at binding chicken.
I think it looks great anyway!
Finished size 57″ x 70″
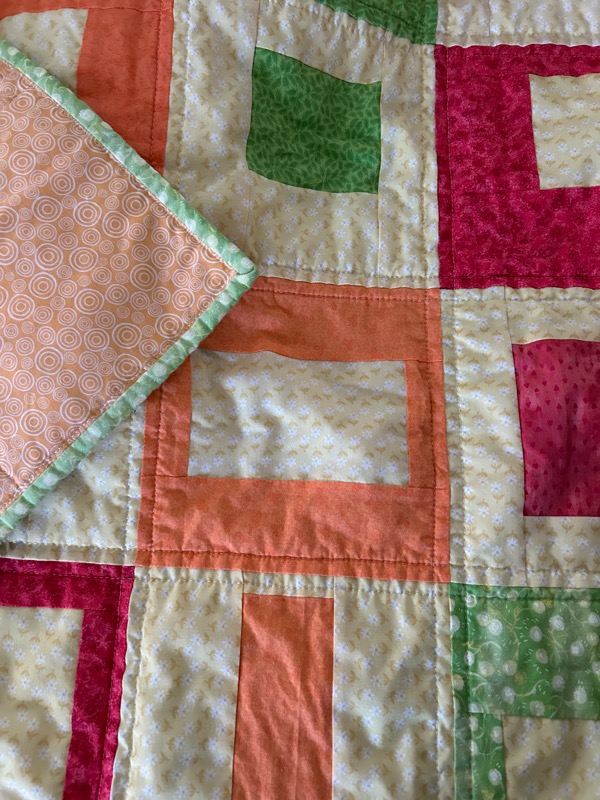
Blanket #28 – October 4, 2024


With my last batch of quilts, I contacted my local Project Linus coordinator to drop them off. I met her at her house, and she invited me in to take a look at fabric. They also get fabric donations and she said I could take some. She also had this quilt, already pieced and basted with batting and a backing. It just needed someone to quilt it and bind it. I happily said yes and took this along with some other fabric. I like how the person pieced the backing and I may steal that. It’s a great way to deal with not having enough of a backing piece. Luckily, I have a lot of oranges so I had plenty to provide a nice binding, including one small piece of backing I had trimmed off after quilting, just to keep with the “pieced” feel of the whole thing.
Finished size: 46″ x 62″
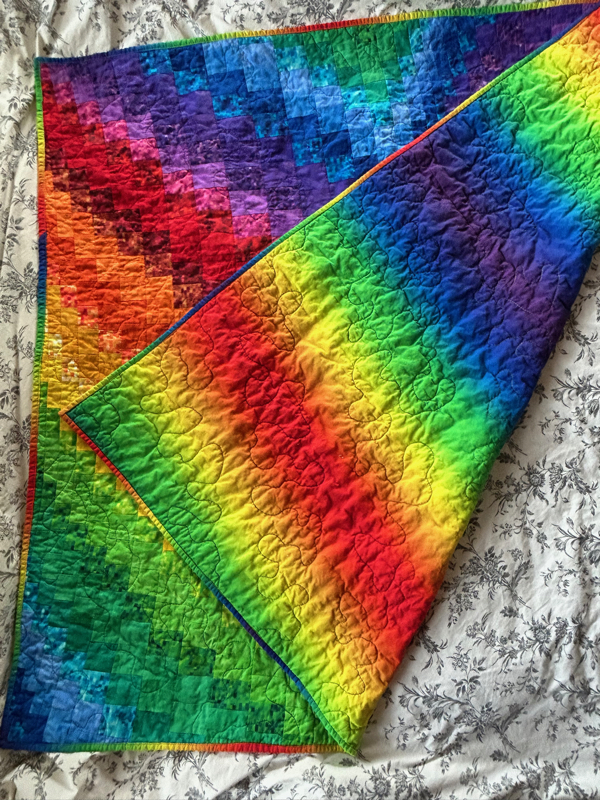
Blanket #29 – October 4, 2024


The pattern is Cobblestone Quilt by Alison Glass. It wasn’t difficult to piece, but it was a bit “fussy”. I prefer to just throw it all together and not work too hard at placement. I think a scrappy version would be much faster. Also, because the pieces aren’t cut the same, it’s a bit more tedious since you can’t just stack a bunch and cut. If I made this one again, with the rainbow or another specific color scheme, I would make more of each square than is called for, so you can be sure to have enough to place them how you want.
Finished size 52″ x 64″
Blanket #30 – October 4, 2024
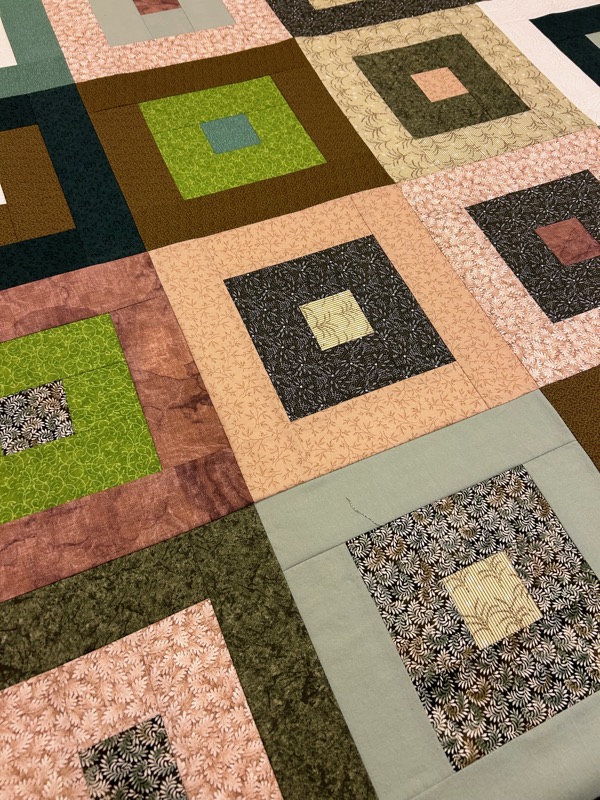
This pattern is Hip to be Square by Jordan Fabrics. Nice and quick to put together. Another one I did with a woodsy vibe. I did make it smaller than the pattern suggested, and after it was done, I realize I should have done 50″ x 50″ rather than 40″ x 60″, but oh well. I still like how it turned out.
You’ll notice the last three quilts have the same finish date and that is correct. For whatever reason, I pieced the last two tops, and as I mentioned had received #27 already pieced and basted, so ended up quilting all three the same weekend.
Finished size 40″ x 60″
-
How a Quilt is Made – For Non-Quilters
In this post, I’ll go through some basics of how a quilt is made in non-quilting terms. I’ll also discuss the costs. In case you were curious, but also so hopefully you’ll understand the value of a quilt, in case you are ever lucky enough to be gifted a handmade one.
First, some of the stuff a quilter needs to have.
- A sewing machine or needle and thread. If someone hand sewed an entire quilt for you, even if it’s the ugliest thing you’ve ever seen, please treasure it. They obviously love you more than life itself, as the time and effort of hand sewing an entire quilt is A LOT.
- Many cutting implements. Scissors at a minimum, but also hopefully thread cutters, and a rotary cutting tool (like a pizza cutter for fabric, makes all that cutting go a bit faster). And rulers and mats to help cut precise shapes.
- Thread. Lots of it.
- Fabric. Lots of it. A basic lap size quilt (50-60 inches wide and 60-70 inches long) can use around 4 yards of fabric for the top. And another four yards for the back. And another yard for the binding.
- Pattern.
- Iron and ironing board for all the pressing.
- Pins, clips, or basting spray for basting.
- Batting (the squishy bit in the inside that makes it all cozy and warm).
- Patience.
The basic steps to making a quilt:
- Prepare fabric. This can mean washing, but at a minimum it means pressing it flat.
- Cut fabric up. Depending on the pattern, this can mean cutting into strips or squares or other shapes like hearts, or some combination. But it’s a lot of cutting.
- Sew fabric into different combinations. Taking all the pieces that were just cut up and sewing them back together in new shapes.
- Press. All the seams that were created from sewing the pieces back together need to be pressed flat, so you can do more cutting and sewing.
- Repeat steps 2 – 4, some number of times. Depends on the pattern. One of the “easier” patterns I just did required me to cut, sew, and press all the fabric three times in different ways. Cut into strips. Sew those strips together. Cut those into squares. Sew those squares together. Then keep sewing squares together until you have a whole quilt top.
- Baste. In this step, a quilter temporarily attaches a big solid back fabric to the squishy middle and the pieced top. Basting keeps them all together for the next step.
- Quilt. Hand or machine stitch designs through all three layers to keep them together hopefully for forever.
- Bind. Put a pretty edge around the layers.
I googled and most things I read said a simple quilt takes on average 25 hours.
Examples costs of a quilt, excluding all the gear like a sewing machine:
Fabric $45 Thread $5 Batting $35 Spray baste $4 Pattern $5 Total excluding time $94 So an average lap sized quilt can cost just under $100 for the supplies just for that quilt. That doesn’t include the cost of the sewing machine and accessories required to make a quilt. Or the quilter’s time. As said above, roughly 25 hours for a simple lap-sized quilt. In New Hampshire, minimum wage is $7.25. So that’s $181.25.
A simple lap-sized quilt on average costs a little under $300 to make. The more complex the pattern, the smaller the pieces, the higher the quality of fabric, the more complex the quilting, the larger the size, hand quilting, hand binding, hand piecing, all increase the cost.
This is why quilts are a labor of love for me, not monetization. If I make you a quilt, you’re either a Project Linus recipient or someone I love very much. 🙂
-
50 for my 50th – Part 2

See my last post for background and the first 10 blankets.
Number 11? – Jan 29, 2024

I had mentioned in my last post that I had a quilt top pieced by a family member, but it wasn’t finished, so I would finish it.
First, I believe this was meant as a wedding quilt. The pieces were hearts, flowers, bells (you know, wedding bells), cakes, and birds. I removed the cakes, hoping that would make it less wedding-y. I had started by machine sewing the applique pieces on, but it didn’t look good, so I hand stitched them with a blanket stitch.
In my quilting days, I used to hand quilt my blankets. In order to finish these within the next 50 years, I’ll need to machine quilt them, which I’ve never done before with success. I have a different machine than I had back then. I bought a free motion quilt (FMQ) foot for the machine. I watched a quick tutorial and with the confidence of someone who doesn’t know better, I jumped in. Some of the parts that I quilted at first leave a lot to be desired. However, I think I got pretty good by the end. I also tried out my walking foot for quilting “in the ditch” around each pieced rectangle. Same thing, janky in the beginning, but not bad by the end.
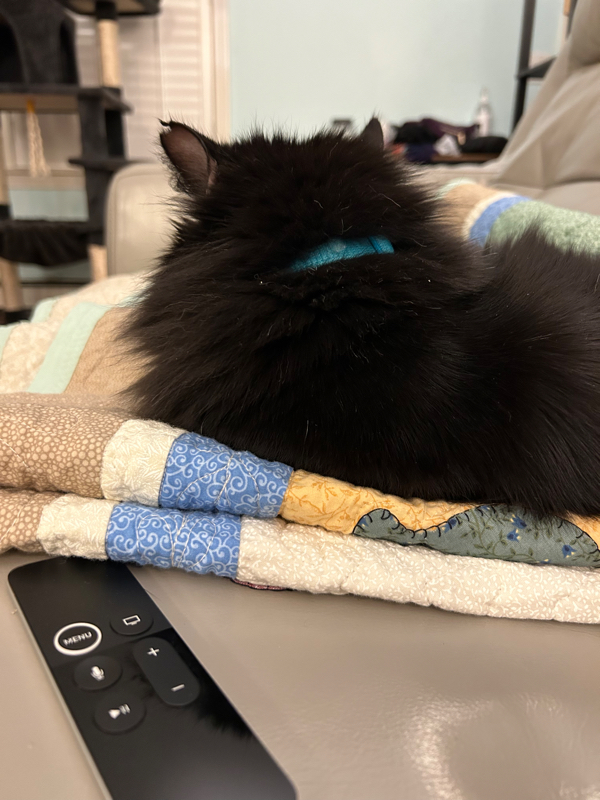
I also used to hand stitch on the binding. Or at least machine stitch it to one side, then hand stitch it onto the other. Again, in the interest of time, I need to figure out how to neatly machine sew the binding on both sides. I tried on this quilt. It was pretty disastrous. So all those issues combined: wedding theme, poor quilting in spots, poor binding all around, plus my usual mistakes here and there… mean I won’t be donating this blanket. My cat however, has happily claimed it for herself. And I learned a LOT on this quilt, so hopefully the next ones will be more successful.
Blanket #12 – Jan 30, 2024
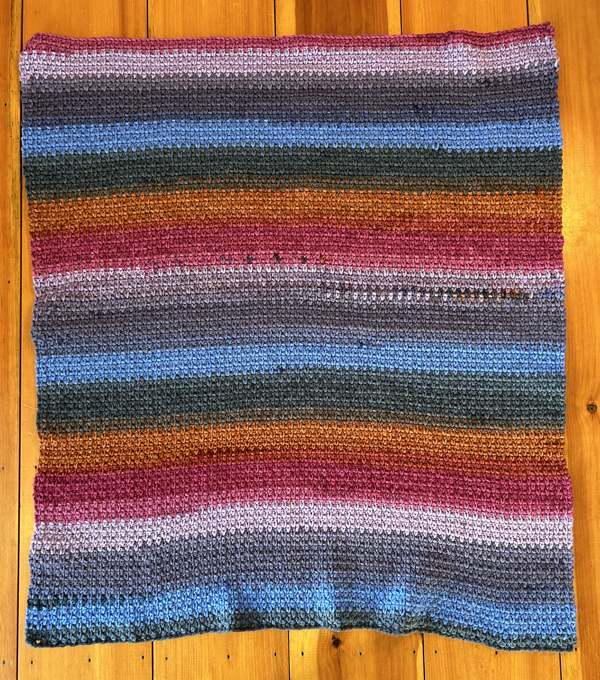
Back to moss stitch! This is once again a Caron Anniversary cake. This time in “Bold Blue Dots”. The edging is Bernat Blanket in “Country Blue”. I used an 11.5mm hook, and the final size was actually 60″ x 40″. I say actually since it may be the first time a blanket ended up the intended size. I don’t love “Bold Blue Dots”, but it was on clearance, and it is very soft. I think the edging helps it out.
Blanket #13! February 13, 2024

This quilt was a long time coming. Really. I cut out the squares in the late 90s/early 2000s. I was big into quilting then, but at some point (likely when I had two small kids running around) I stopped. I was going through my scraps to start a new quilt and found all these cut squares! Some had already been pieced into the four-squares. Yay past me! Back when I was quilting, 1930s reproduction fabrics were popular and I LOVED them. Making this quilt made me so happy. It’s also my first successful free motion quilted blanket! And I successfully figured out machine sewing the binding! I’m very very pleased with this one. Finished size 45″ x 56″.
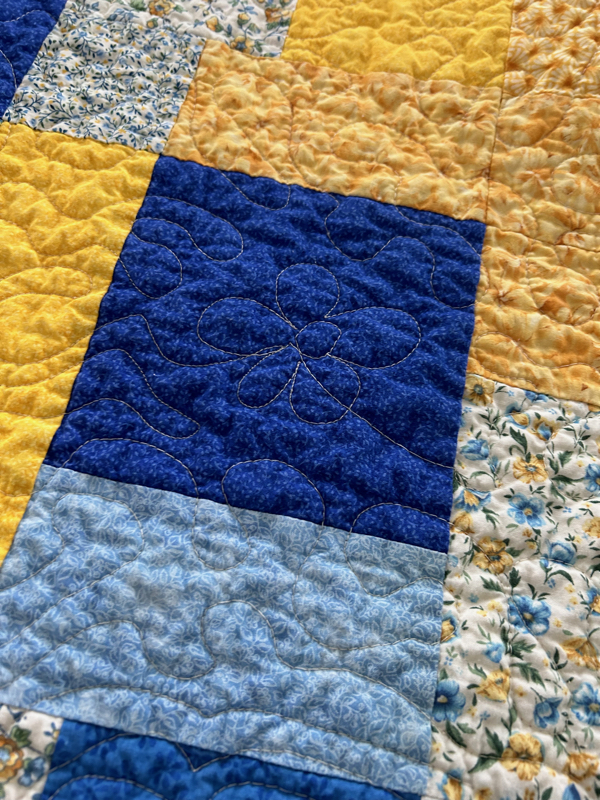
Blanket #14! March 4, 2024


Top left: the finished quilt. Top right: the back. Bottom left: close up of the quilting. Bottom right: the top just after piecing with large scissors to show scale
A family member (the same one as the unfinished quilt top from blanket #11) gave me a huge stash of fabric when she downsized. I went looking for “fat quarter friendly” patterns and came across Yellow Brick Road from Atkinson designs. I ordered that and a few others. I received my order, but it was the wrong thing! Instead I received a booklet with different patterns. While I waited to get my correct order, I figured I’d make “Layer Cake” from the book that was delivered. It was great fun to go “shopping” in the fabric stash. Layer Cake uses 15 different fat quarters, so I had to find 15 fabrics in the stash that would coordinate. I love how these came together.
The pattern itself was fairly simple to do. Cut lots of strips, sew them together, then cut into blocks. I did make one critical mistake of not checking the first set of sewn together strips for size before doing all of the others. They were a bit short and I had to really press them out to get them to size.
Tracking costs, I purchased $15 of machine quilting thread in blue for this one.
Finished size: 50″ x 62″ (I think my largest yet for Project Linus)
Blanket #15 – March 10, 2024


Top left: full quilt. Top right: up close of the quilting. Bottom left: scissors for scale. Bottom right: back of quilt
This was the Yellow Brick Road pattern I mentioned in the last blanket update. This pattern was very fat quarter friendly. Coupled with my Creative Grids Stripology ruler that I received for Christmas, this was very quick to cut out. Piecing went relatively “quick” as well (relative to other quilts). Once again I used fabrics from my relative’s donated stash. I did purchase two fat quarters for the binding since I didn’t have any more blues of the right hue. The two fat quarters (plus some extras that fell in my cart!), the patterns I purchased, and some more thread, came to $52. Really pleased with how this turned out. Finished size 64″ x 46″.
Blanket #16 – March 15, 2024


The top left photo is the quilt laid across my king size bed, if that helps with scale.
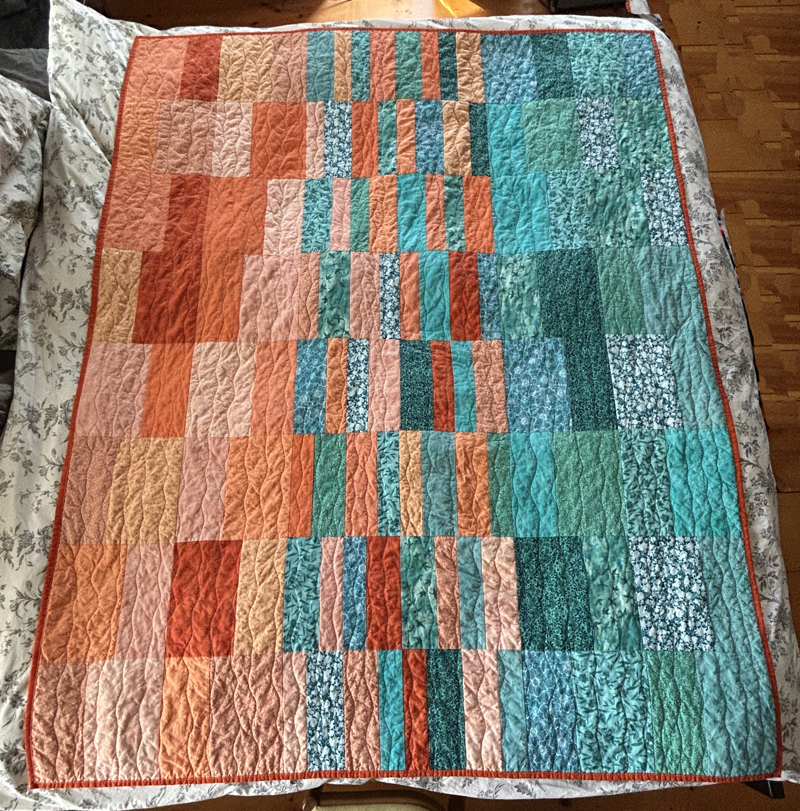
I love this one! Love, love, love. The family member that gave me their fabric stash is a huge fan of orange. For over a year, I’ve been obsessed with orange and teal as a color combo. I crocheted a hat in those colors, I’ve done numerous paintings with those colors. When I saw the Morning, Noon, and Night pattern that transitions from a contrast color to a dark color, I knew it would be perfect.
Unfortunately, I didn’t have enough teal fabric, so I did have to buy some fat quarters, as well as fabric for the backing and binding. I also was close to running out of batting. And more basting spray. So $89 later and I was ready to go. I also purchased more rotary blades and machine needles, coincidentally another $89.
Finished size is 60″ x 76″, definitely the largest I’ve done for Project Linus. I can’t really go larger and still machine quilt, so I think this is the max for now.
Amusingly, I was watching the current season of Survivor and their buff color is orange and teal, so I’m guess I’m on trend. Ha!
Blanket #17 – March 19, 2024


Another Yellow Brick Road, but maybe call this one Yellow Brick Road through the woods. I wanted to do something less floral and a bit more subdued. My family member stash had lots of browns and greens, perfect! Including several yards of the fabric I used for the backing. So no additional money spent on this one! Well, except for the even feed foot guide, but that’s “gear” and I’m not counting that towards my Project Linus blankets. It was GREAT to use. It attaches to your even feed foot and allows you to make a straight line off of another nearby straight line, so I used the seams of rows to guide off of. I saw this randomly spaced quilting lines pattern on another quilt and wanted to try it out. I love it! Though it can be difficult to be purposefully random.
I also tried to time how long each step took. I forgot to turn the timer on a few times, but my best estimate is that this quilt took 8 hours start to finish, spread out over several days. I got this pattern because I had heard it was a quick one, and the rumors are true! Especially my second time around. I’ll definitely be making at least a few more of this pattern for Project Linus.
Finished size 64″ x 46″.
Blanket #18 – March 25, 2024
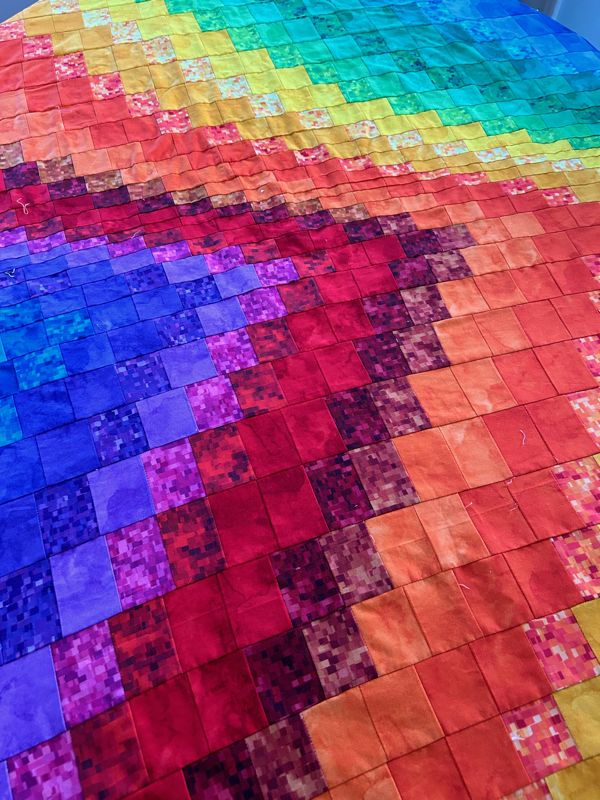
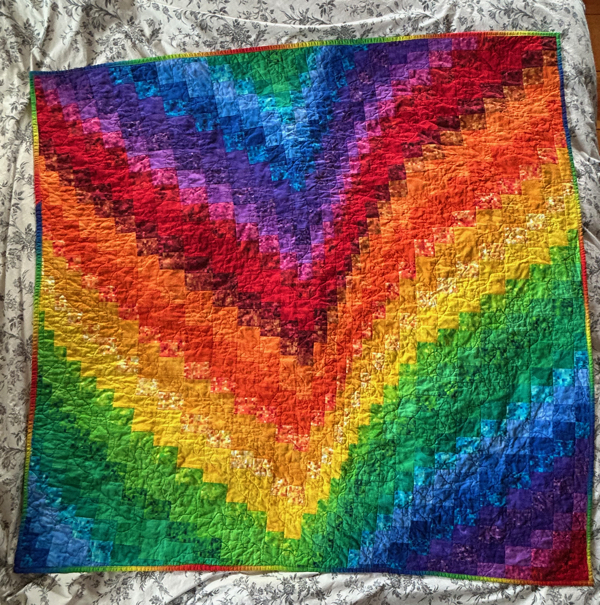

This is another quilt that has been years in the making. I saw a rainbow bargello quilt and loved it. I found a “pattern” on the internet. I went out to buy two jelly rolls. Jelly rolls are sets of pre-cut strips in various fabric sets. The pattern called for two matching jelly rolls. The store didn’t have two matching jelly rolls, so in my impatience, I figured two coordinating jelly rolls could be combined to make two matching rolls. The pattern I had found was really more of a blog entry on how to do it. Not detailed instructions, and definitely didn’t include warnings or gotchas. I began sewing my strips together.
Now, a short digression here. First, quilting, like baking, very often needs to be precise. I however, quilt like I bake, which is to sometimes wing it. This sometimes works out. It sometimes does not. So the first issue was that because these were two different jelly rolls, even though they both SAID they were 2 1/2″ wide, they were not the same size. Sometimes that wouldn’t matter, it very much matters in this quilt. The second issue was that I didn’t read all of the comments on the blog post. Especially the comments that recommended sewing in alternating directions. Meaning if you sew strip A and strip B and start at the “top”. Then when you sew strip B to strip C, you should start at the bottom. Not alternating can cause the quilt top to get a bit wonky. My next issue is that I’m lazy. So I don’t always pin (or clip) things. Again, most of the time, this is fine. It was not fine. So you sew all the strips together forming many columns (if you think of a spreadsheet). Then you slice into rows. Then you offset the rows and sew back together. Again, alternating sewing direction and pinning. I did neither for my rows or my columns. I ended up with a trapezoid rather than a rectangle. I did my best to square it up, but I didn’t want to cut off all that work.
Anyway, the purchasing of the rolls and half of the strip sewing was done years ago. I put it away unfinished. Pulled it out at the beginning of this Project Linus journey. Saw that it was going wonky and put it away. It’s been stopped and started so many times.
I FINALLY finished the top. And for some crazy reason decided I should quilt each color in matching thread. Which maybe turned out to be the only good decision I made. I love how it looks. I love the back of the quilt almost as much as the front, which is depressing since it’s really just four pieces of fabric sewn together (oh yeah because I screwed up and cut the backing wrong).
Note to my future self, if you ever decide to do this again: get two of the same rolls, get an actual pattern, sew alternate directions, pin things, lock end stitches (with so many small pieces and handling, they began to come apart), start with the big wedge not the small, and possibly use a walking foot even for piecing.
Finished size, a trapezoid, ROUGHLY 60″ “square”.
Blanket #19! – June 23, 2024


Around mid-April things got a little hectic around here. I was out of town for 19 days over three separate trips. My daughter’s college had a pinning ceremony, my son graduated high school. So there were two quilts that had been cut out and blocks sewn together, then abandoned on my sewing table.
I finally finished one of them. Even though this quilt isn’t my style in terms of color or pattern, I absolutely love it. I wish the photos were more true to color, it’s brighter and cheerier than the photos show. Unfortunately, I can’t get better photos without taking the quilt outside and I don’t want to risk getting it dirty.
Yellow Brick Road pattern again. These were all fabrics I had, either from my family donation, or in my stash. I had yards and yards of the floral fabric. I suspect they were going to be curtains. So I matched the other fabrics to colors in the florals. I finished it with a meander quilting pattern, except on the flowers, which I outlined or did flower-y shapes.
Finished size 47″ x 65″
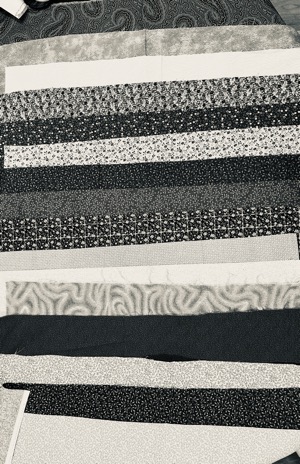
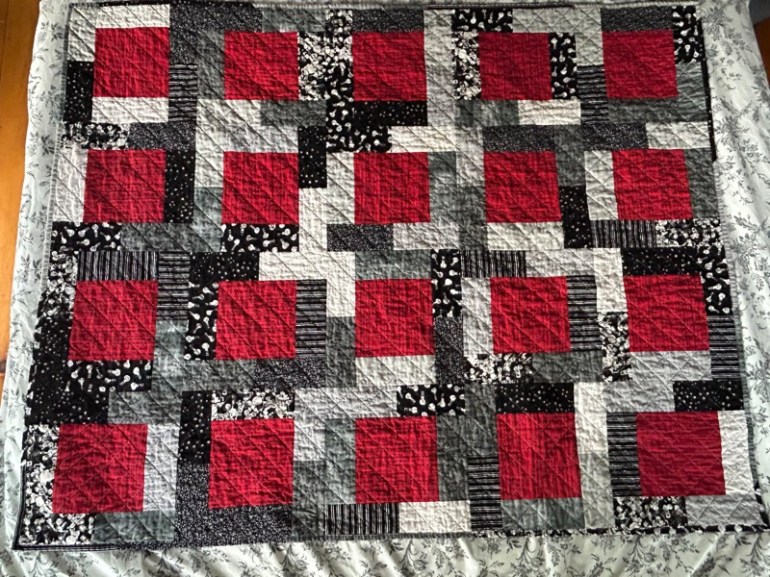
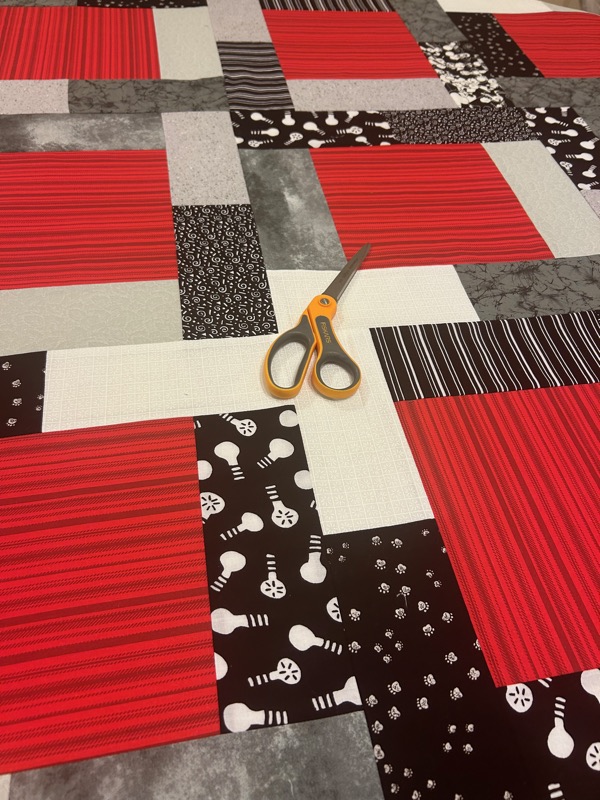
Blanket #20! – July 4, 2024


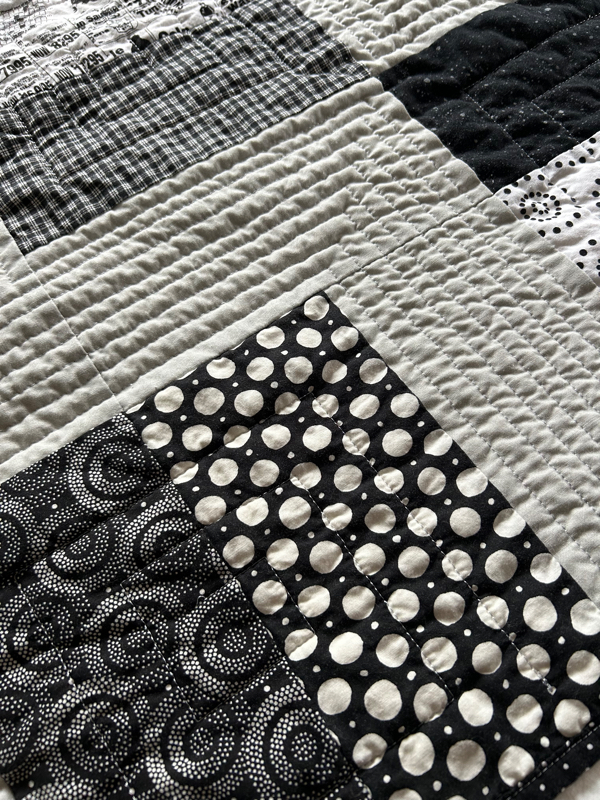

Do not adjust your screen! This one is black and white! (Please do pardon the creases, I was so excited to take a pic I couldn’t wait for it to settle after being in the dryer overnight). This was the other one that was mostly done before I went on hiatus. I wanted to do another one “less floral”. A couple of new things for this one. I saw this pattern and thought I could figure it out without actually using a pattern, and I was correct! Just a little bit of math and planning and I did it. The second new thing is that this one has a binding made up of several fabrics instead of just one.
I love how the quilting came out. Although it was a pain to do! While very simple, it required turning the quilt on every one of those corners. Even inside the squares, I decided to do a square spiral, which took even more turning.
A few purchases were necessary for this quilt. I didn’t have enough black and white, non-floral fabrics, so I ended up buying a BOX of fabric on Facebook marketplace. A lovely woman was downsizing her home and therefor her stash. She had so many boxes for sale, luckily/unluckily, I stuck to just this one. Total price: $25 for way more fabric than I used for this quilt. I bought some new thread. I’m a big fan of Juki Junkies and have learned a lot about my machine from them. They sell and recommend Glide thread, so I bought a 4-pack to try out. That was $20. Though I’m maybe halfway through one spool after this quilt. Lastly, I had to buy fabric for the backing as I didn’t have enough of any single fabric. $22 (with some fabric leftover).
Finished size: 55″ x 64″
-
50 for my 50th

My 50th birthday is approaching. I saw a tiktok where a woman donated 60 “cake kits” to a food kitchen for her 60th birthday. I loved the idea, but wanted to put my own spin on it. So to celebrate my 50th, I’ve decided to quilt and crochet 50 blankets to donate to Project Linus. I’m blogging it for a few reasons. To hopefully inspire someone else like the tiktok I saw inspired me. To share the process of making 50 blankets (and so I remember the process in the future). And to bring awareness to Project Linus.
“Project Linus provides handmade blankets to children 0-18 in the United States who are seriously ill, traumatized, or otherwise in need.” https://www.projectlinus.org/
I figured I have plenty of yarn, loads of fabric, and far too many WIPs (works in progress) that need a reason to be finished.
While reading up on Project Linus, I’ve read comments in quilting and crocheting subreddits from people that were recipients of a Project Linus, or their child was, and how much it meant to them. It’s incredibly motivating to finish off those WIPs.
Blanket #1:

This was actually a blanket I made a couple of years ago, but never wove in the ends. I had intended to auction it off for charity. It’s a corner to corner blanket. My “test” of the technique before trying something more difficult. The yarn is Red Heart Soft Essentials, so it’s quite thick and warm. It’s 50″ x 54″ I did take this cute photo with my cat, which I now know is a no-no. Spent some time lint rolling off any stray cat hairs. Wove in the ends. I don’t recall how long the original blanket took to do, but the weaving in ends and lint rolling was only a couple of hours. Blanket 1 done.
Blanket #2
I had leftover Bernat blanket yarn in cream, dark grey, and light grey, so thought this would be a quick one. I chained across, then did single crochet across in the same direction. Aka, I didn’t turn for the next row, but went back to the beginning for each row and tied off the ends. About halfway, I ran out of the greys, but never fear, I had a dark green and light green in the same Bernat blanket yarn. (Seriously, my basement is like a Jo-ann Fabrics). Finished size is 39″ x 42″. This took me a couple of hours over a couple of evenings. Again, I took this pic before I realized I should keep the cat away. More lint rolling, and blanket #2 was done.
Blanket #3 (in real life the reds aren’t quite so…vivid)

I had sewn together log cabin squares for a Christmas quilt so long ago I a) had forgotten they existed and b) forgotten why I never finished it. As I assembled the squares, some of which had already been attached to other squares, I realized I must have put them together incorrectly the first time, and couldn’t be bothered to fix it in order to finish. I also had some half-pieced squares as it was meant to be a larger quilt. No matter, I could now use them for both the front and the back as this would be a lap sized quilt.
However, I ran into my first problem. While I have loads of yarn and fabric and half finished quilts, I had NO batting. So I ordered 10 yards of 90″ batting ($48 on sale). I sewed together the squares, sandwiched them with batting, and quilted the blanket. Including two little hearts in two of the square centers. I then realized my second problem. I didn’t have any binding (or thread) that would match and there is no way I’m making binding for each of these quilts. Off to the store and lucky me, another sale. Six spools of thread, and hopefully binding for at least three more quilts purchased ($35). I’m really hoping that’s the last actual money I’ll need to spend. I spent some extra time trimming any stray threads and no cat for size this time. No recollection of how long the squares originally took to piece, but ironing, sewing them together, quilting, and binding took most of a Sunday. Blanket #3 done.
Blanket #4 (again, I’m apparently terrible at capturing the true colors in a photograph, it’s lovely teal, purple, navy, and a bit of green-ish/yellow)

This was actually the FIRST blanket that I started. I had previously made a sweater with this yarn that I ultimately didn’t like and frogged it. (“Frogging” is the act of unraveling something, “rip it rip it”). I’ve seen waffle stitch before and love how nice it looks. It looks modern, not like an old aphgan from the 70s. So I wanted to do try it out on this blanket. The only problem is that waffle stitch takes FOR-EVER. So despite being the first blanket I started, it’s taken until now (#4) to complete it. Waffle stitch is also a yarn eater, so this one is on the smaller side. Finished size 27″ x 39″. However, it’s so nice and thick, and I do really love how waffle stitch looks. Blanket #4 done.
Update:

The latest update is not a finished blanket. While I’ve been working on my blankets, I’ve found several thank you notes, stories, etc about people who have received a Project Linus blanket and what it means to them. People who have had their blankets for YEARS and it is a treasured item to them. I mistakenly thought Project Linus only gave blankets to babies in hospitals. Project Linus donates blankets to hospitals, yes, but also to foster homes, therapists, fire stations, and so much more, to babies, and toddlers, and tweens, and teens.
Reading about so many kids who have loved their blankets is heartwarming and motivating me to complete my blankets. BUT it also makes me want to create a quality blanket, rather than rushing to just get them done. The above heart in the photo is from a quilt top that a family member had made, but never finished the quilt. There are loads of shaped cut out and fused onto the top, but not stitched on. I attempted to machine stitch them on, but it just didn’t look good, even though it would be much faster. So now I’m here, hand stitching them on. I’m also part way through a crocheted blanket. Again, it isn’t fast, but it’s lovely (I almost want to keep it!). I definitely won’t be getting 50 blankets complete BY my birthday (which is tomorrow), but again I said it was FOR my birthday. My challenge, my rules. 🙂
This is 100% a labor of love that makes me feel good whenever I’m working on them. Finishing a quilt top from a family member. Using two different sewing machines for some of the tops, one that very same family member bought me 30 years ago, and another that my boyfriend researched for me when mine broke during the pandemic. Using up leftover yarns from other loved projects. Ultimately (hopefully) bringing some happiness to someone else.
Blanket #5:

I adore this blanket. It’s incredibly soft and thick. The moss stitch gives such a nice drape. I adore the colors (the photo on the right shows the colors more accurately). Finished size 46 x 54″. Made with Caron Anniversary cakes (Purple fog), moss stitch, 11.5mm hook.
Three other blankets are currently in progress besides this one, but I managed to finish this one first. Now that I’m five blankets in, I realize what SHOULD HAVE BEEN OBVIOUS, switching yarns slows me down. The entire blanket was one and a third skeins (the yarn changes colors rather than ME changing colors). So I only had to switch yarn ONCE. I was able to complete it within a couple of days. As opposed to another blanket I’m working on which is taking much longer as I switch yarn every row. It also helps the anniversary cakes are HUGE at 1,061 yards per skein and super bulky weight.
I also said I was going to use my stash, but Black Friday was here and I definitely won’t have enough stash for all 50 blankets, so I bought enough of this yarn for two blankets, plus enough of another yarn for a different blanket for $120.
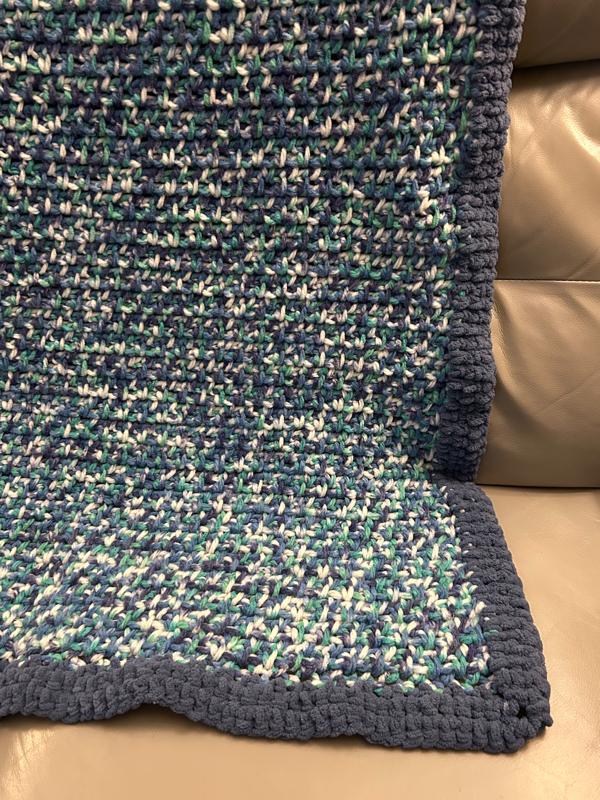
Blanket #6:

I saw this pattern in the Facebook Project Linus group and it seemed like a fun one. I used Caron Cakes yarn in Blueberry Cheesecake. I used a size H (5mm) hook. The finished blanket is 50″ x 50″ and took six of the cakes. As I found in blanket number 5, it’s much faster to use yarn that changes colors rather than ME changing colors. Of course then you’re at the mercy of when the yarn changes colors (note what looks like a mistake in the center dark square was just due to when the colors changed in the yarn). This was pretty “quick” to create, probably 50-70 hours.
Blanket #7

This one is the same yarn and stitch as blanket number 5 (Caron anniversary cakes in Purple fog, moss stitch, with 11.5mm hook). Despite my best effort, it was narrower than I intended, so I gave this one a border of half crochets. Final size 43″ x 64″.
Blanket #8

I love this one! Scrap blanket in ripple stitch. These were all leftover yarns from other projects. Mostly worsted weight, though a couple were lesser weight, so I doubled them up. I just started each color where the prior one ran out and joined with a “russian join”. While it’s certainly easier to do the larger chunks with less color changes, I really like the areas with small amounts of yarn and lots of color changes. I used a 5.5mm hook throughout, even when yarn weights varied. Finished size: 47″ x 57″.
Blanket #9
Way back in an update after blanket #4, I mentioned a blanket I had started. That is this blanket. It was very slow going, and so I kept putting it down to work on other blankets. I finally finished it. Moss stitch with alternating light and dark scrap yarns. A size 4.0mm hook and changing yarns on every row contributed to the slow speed. Finished size 41″x46″. I love this blanket so much.
Blanket #10

This one is a combo. The same yarn as number 7 and number 5, with the ripple pattern from number 8. It’s smaller than the others because it’s all I had left of the Caron Anniversary Purple Fog (which has been discontinued and that makes me so sad). I used a 11.5mm hook as before with this yarn. Finished size 35″ x 35″.
-
Cute (and easy) crochet hearts!
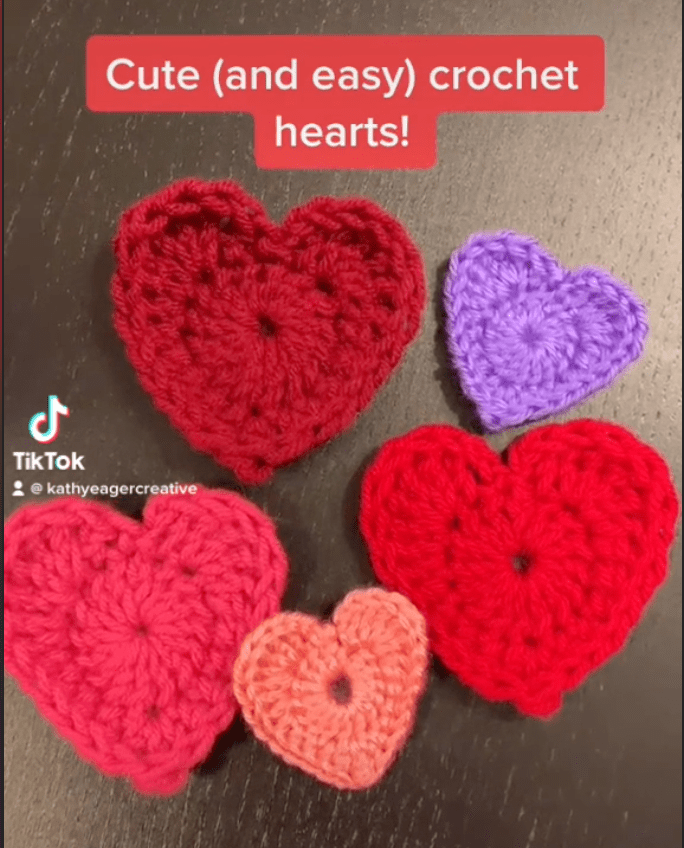
A little over a year ago, I made a tiktok showing how to make cute and easy crochet hearts. Limited by a short amount of time for a tiktok, it’s hard to show exactly how to do it. So here’s some instruction…
What you’ll need – yarn, hook, scissors, tapestry needle (optional for weaving in ends)
Thicker yarn and/or a larger hook will give you bigger hearts. Smaller yarn and smaller hooks mean smaller hearts. I generally use the hook size recommended on the yarn itself.
All instructions are in US terms
- sl st – slip stitch
- SC – single crochet
- HDC – half double crochet
- DC – double crochet
- TR – triple crochet
Start with a magic circle, then chain 3
Round 1 – DC 15 times into the circle, then sl st to the starting chain 3
Round 2 – chain 2, DC in the same stitch, 4 TR in next, 1 DC in next, 4 HDC in next. For the point of the heart in the next stitch: 1DC, 1TR, 1DC in same stitch. 4 HDC in next, 1 DC in next, 4TR in next, 2DC in next, SL ST.
Finish off and weave in ends.
-
2022 Daily Creativity

As I posted over on my “personal” blog a few months ago (and on Facebook a year ago):
Every year around January 15th, I notice someone is doing some sort of daily challenge. Like “take a photo every day of the year”. It always appeals to me, but feels wrong to start mid-January. So this year, I managed to plan ahead. I decided to “do something creative every day of the year”. There are some obvious choices for me: crocheting, sewing, embroidery. But I also added playing music. And also baking/cooking. I used to do both quite a bit, but haven’t really in years. There’s no time minimum per day. Just that I do SOMETHING and post it on Facebook/Instagram for both accountability and record of it (and those memories to pop up next year!).
And here we are closing in on the end of the year. And being me, I had to put together some stats on how the year of creativity went. I’ve still 2 days to go, but as of 363 days done…
I missed 4 days.
My activities fell into 12 categories: watercolor painting and crochet were the most frequent by far (which you would guess if you follow me on Facebook or Instagram). Some days had more than one activity, but for the activity I “counted”, I did watercolor 176 days and crochet 150 days. Everything else was in single digits. Playing bass, sewing, drawing, photography, writing, stamping, and lettering were some of the other categories. Playing the bass had a strong start, but then I ignored it for the rest of the year.
What have I learned?
Just do the thing. If you want to do something, do it. Don’t worry about being bad at it. Don’t think you have to commit a TON of time to it. Some days I just did a few stitches, or a quick watercolor sketch, or even just tested my brushes. In (almost) a year, I’ve gone from never having painted with watercolor before (and very limited painting of any other medium before that) to actually liking some of my creations and even selling a piece to a complete stranger on the internet! (aka they have no guilt or reason to “pity buy” from me).
Be bad at things. And be okay with that. I think I learned the most from the paintings I didn’t like. I crocheted an entire sweater that I ended up hating and un-doing. That’s okay. Bad paintings and crappy sweaters, don’t mean I’m not good at painting or crochet. They DO mean I took risks, I took chances, I grew, I learned.
Tips for doing this or something similar
Don’t make it a big deal, but do make it a priority. What do I mean by “don’t make it a big deal”? I mean don’t stress. It shouldn’t feel like a chore or something you dread. It doesn’t need to be an hour a day or some big commitment. It can be small and quick, if that’s all you can do that day. But do make it a priority, sometimes having that mental nudge to do SOMETHING moved me from scrolling tiktok endlessly, to getting up and painting something. If I didn’t have the “streak” to maintain, I might have skipped it and missed out on some great creations.
And on to 2023…
I think I’ll continue to do this, but I likely won’t post about it daily. Though I absolutely loved hearing from people that they were inspired to do something creative! I also loved that daily posting meant I posted the bad stuff too, so I’ll definitely continue to post good AND bad highlights!
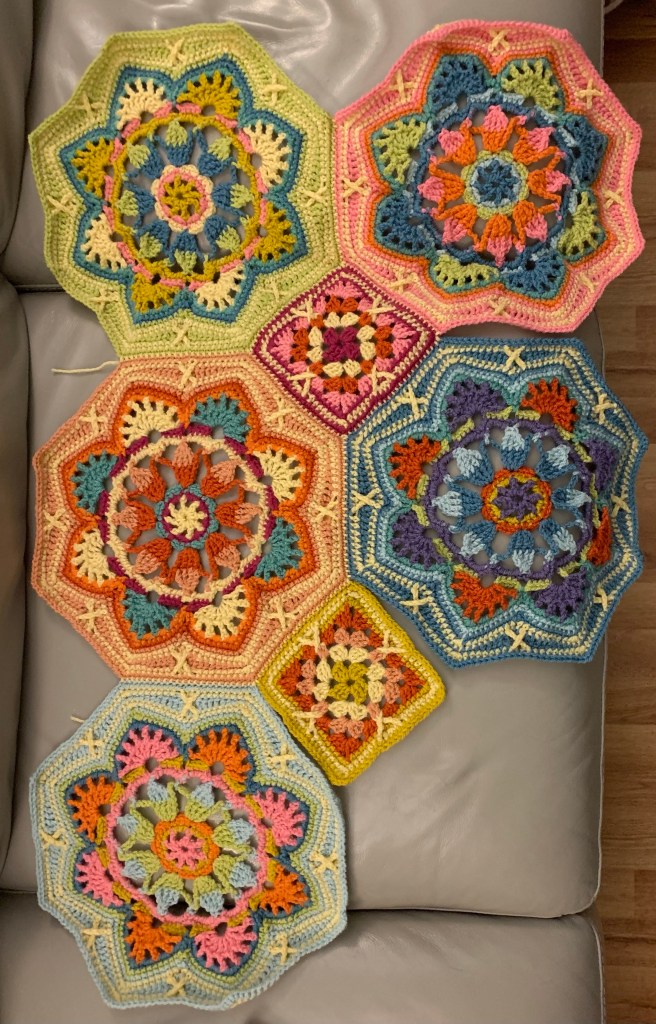
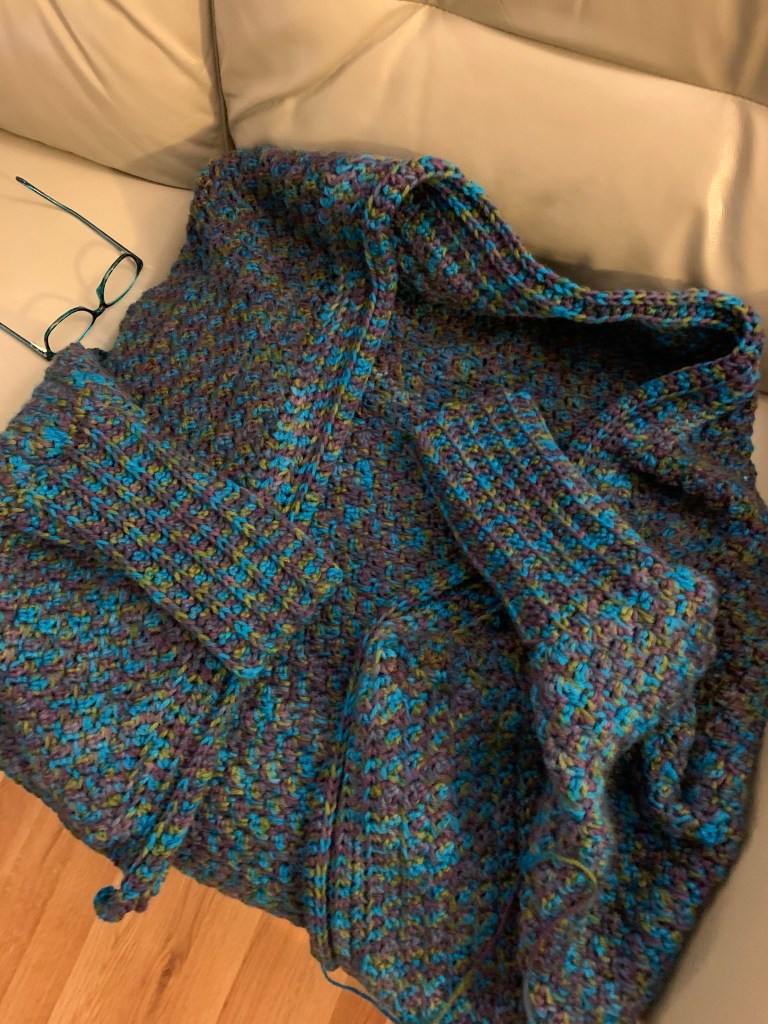
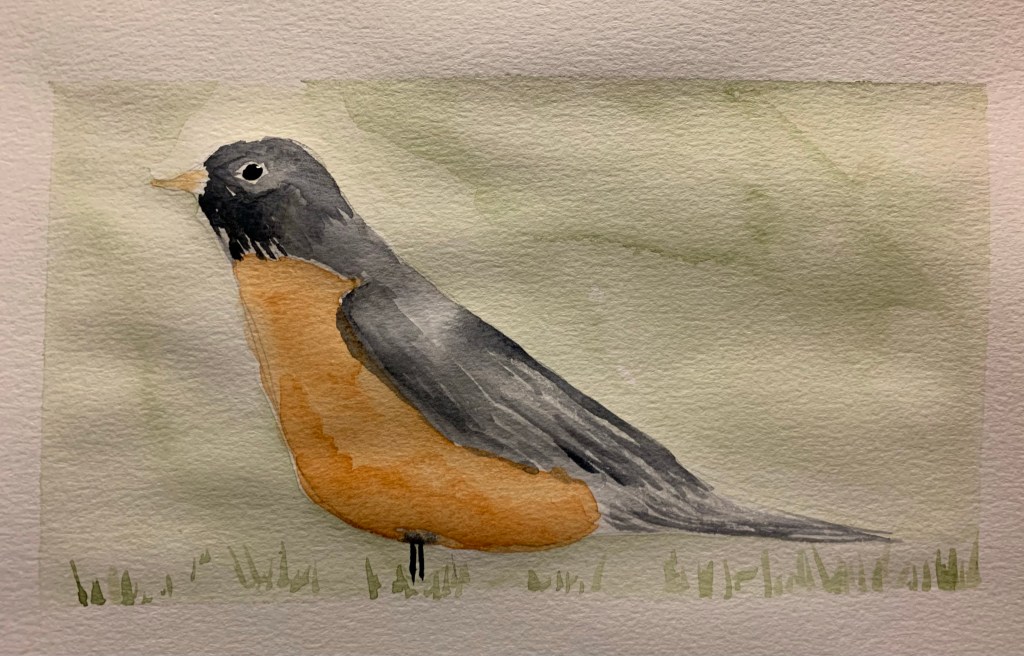
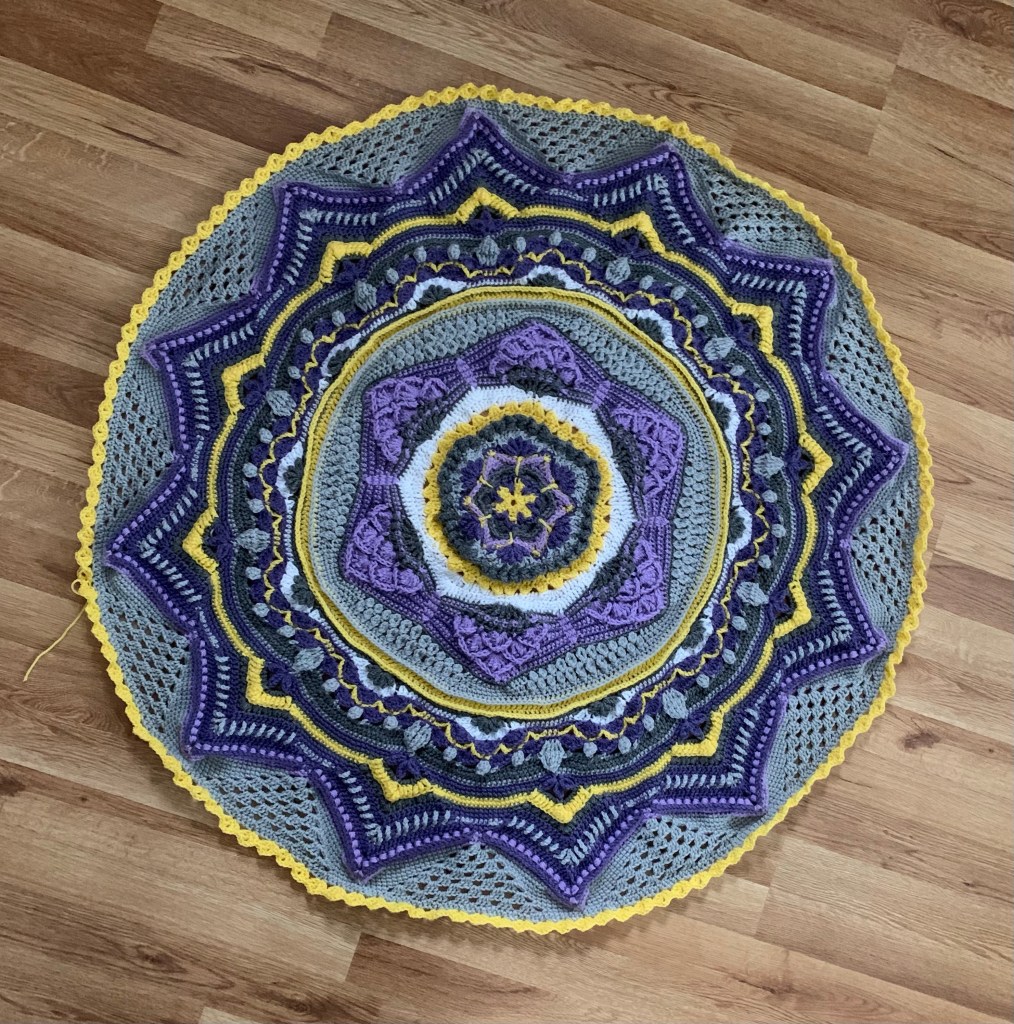

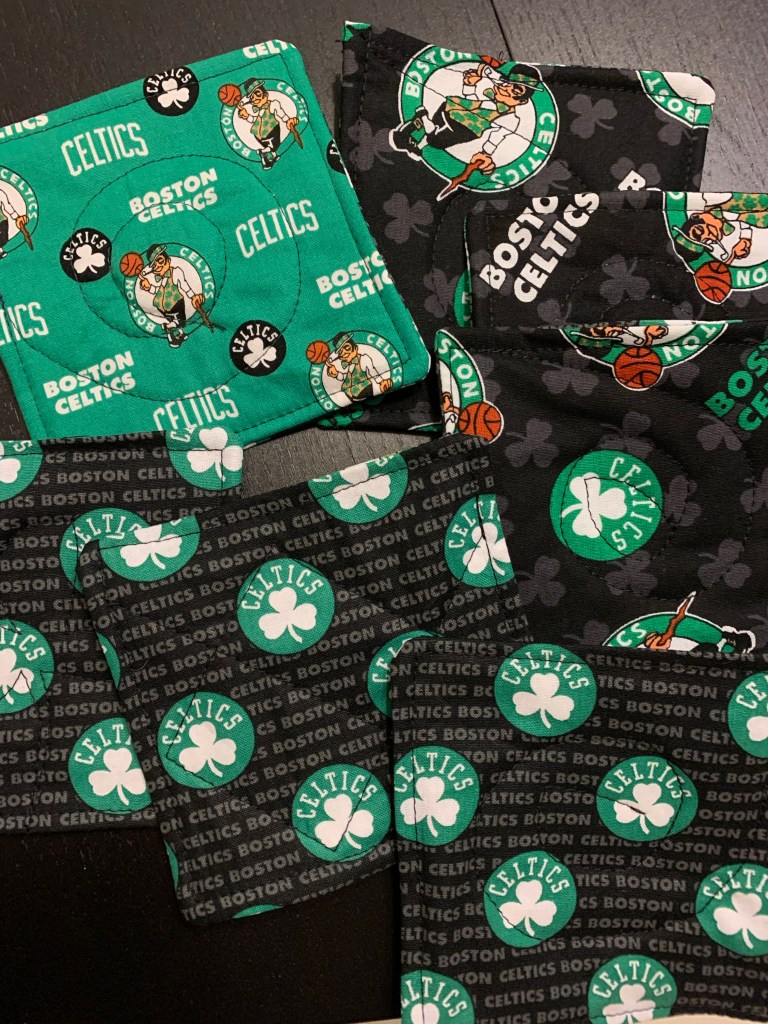


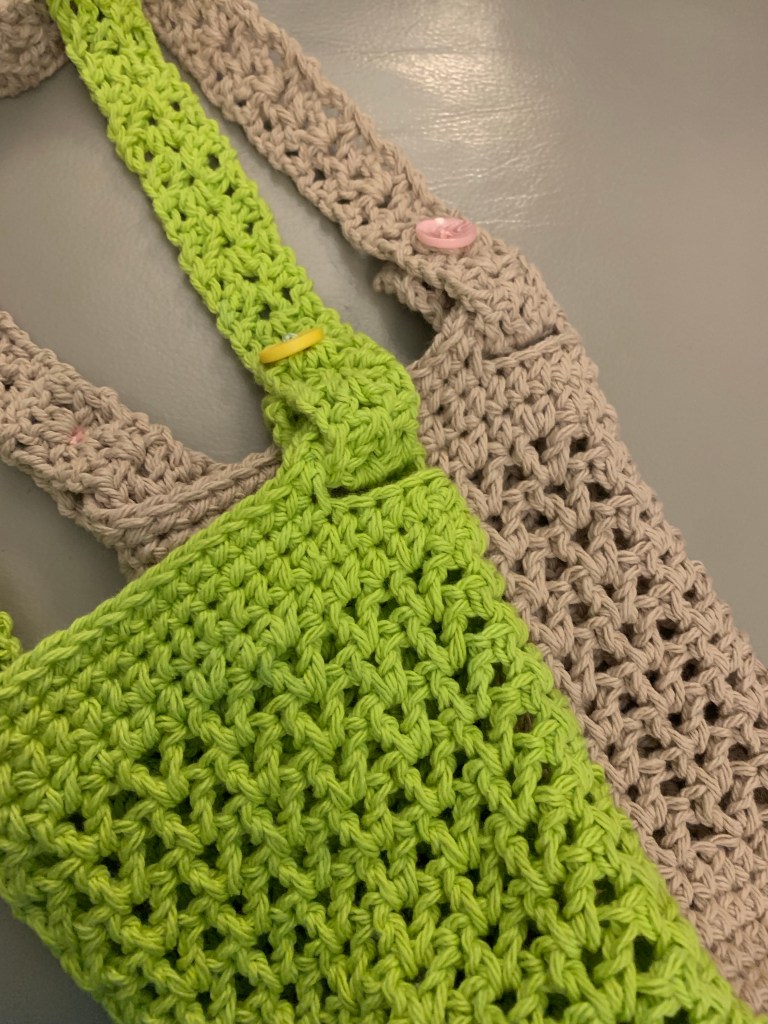

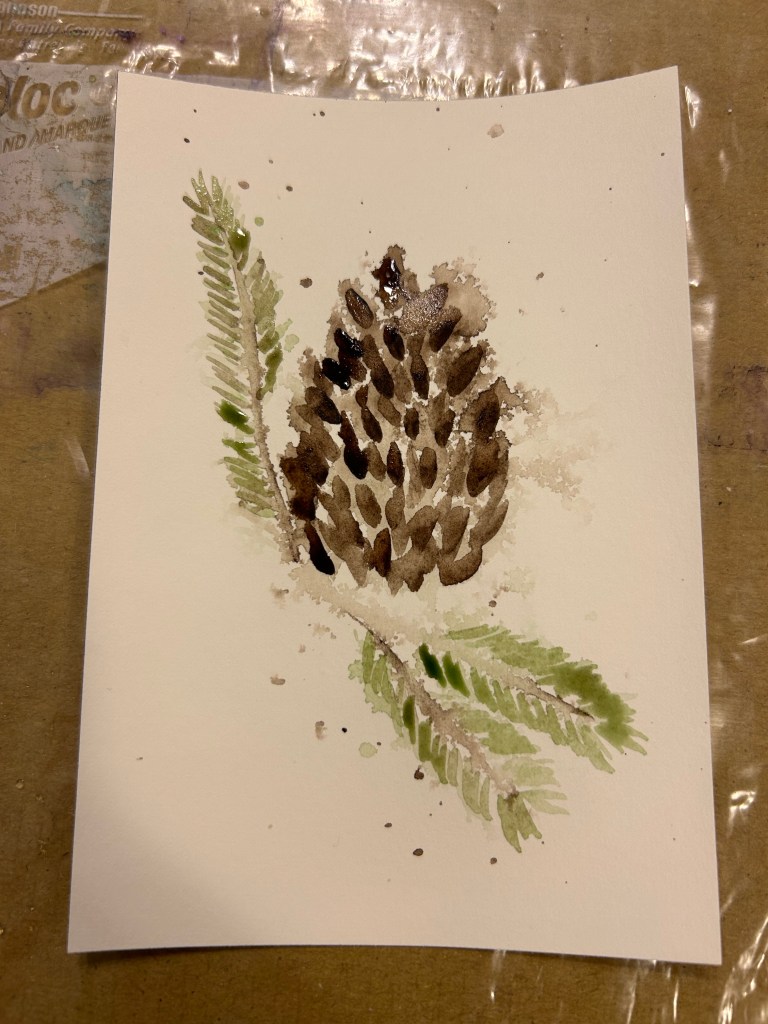
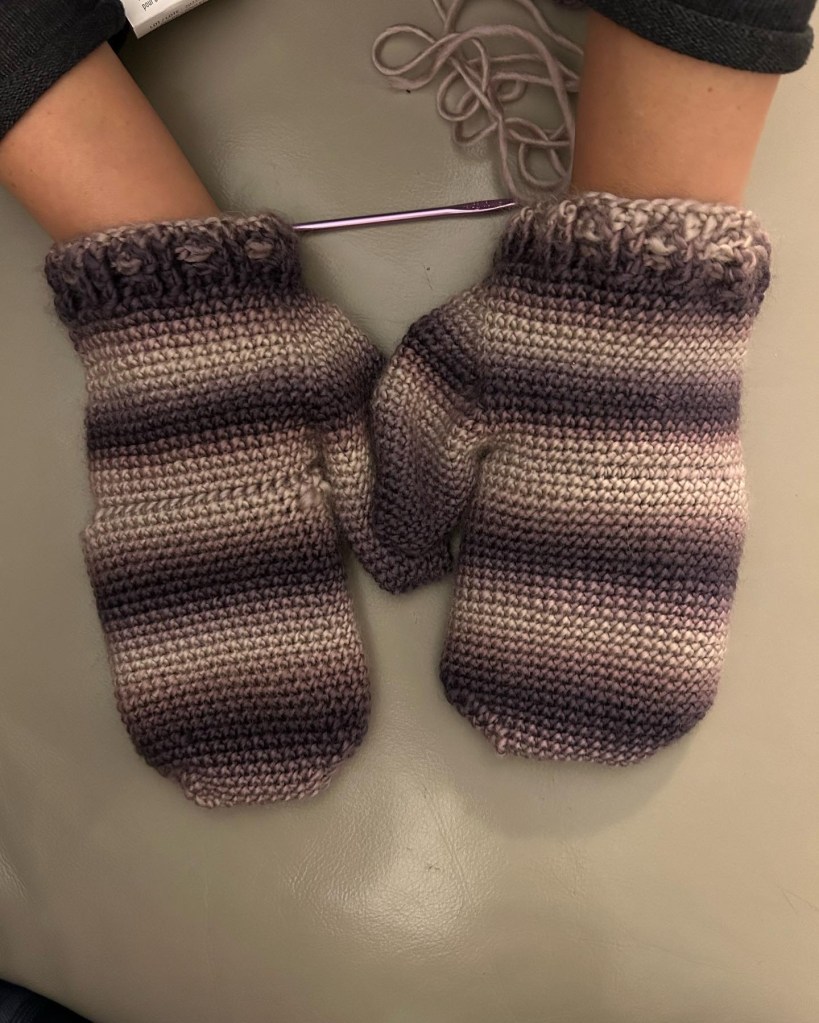
One photo for each month. Top row: the eastern jewels blanket I haven’t finished, the sweater I finished then ripped out then re-did, a watercolor robin. Second row: the mandala blanket I haven’t finished (I’m sensing a theme), the Tatooine bookmark (which prompted a commission!), some Celtics coasters I sewed. Third row: watercolor koi fish, one of my NH48 series watercolor, two crochet bottle holders. Fourth row: another NH48 watercolor, pinecone watercolor which inspired my holiday cards, and two crochet mittens.
-
Greeting Cards
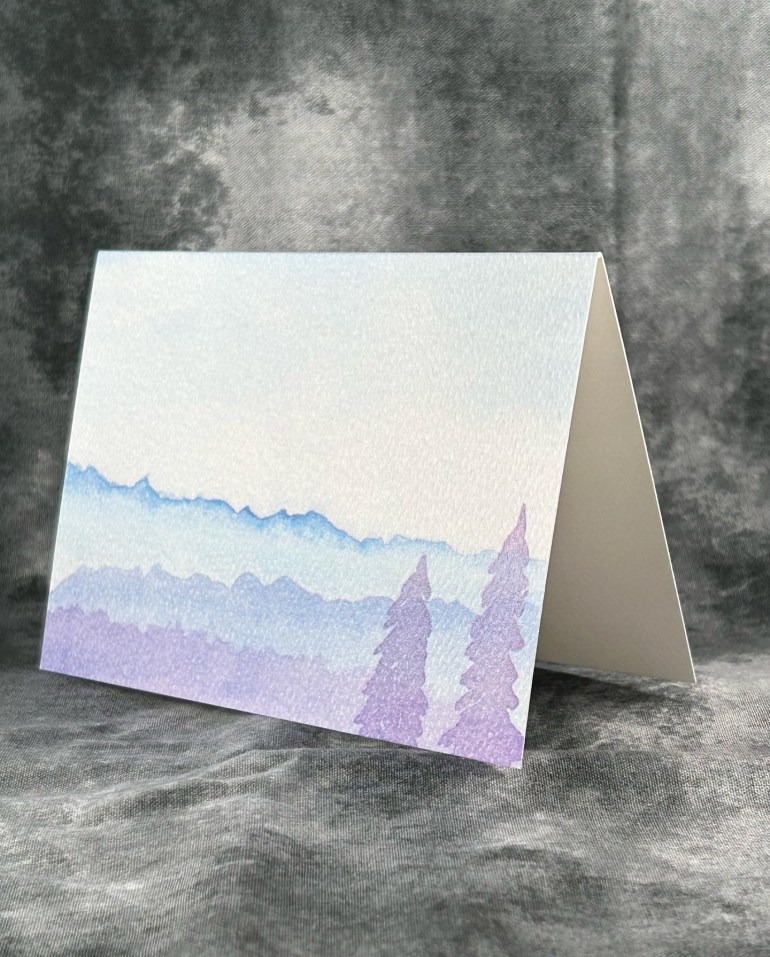
I’m an avid hiker and get a lot of inspiration from the mountains. These greeting cards are prints of two of my original watercolor paintings.
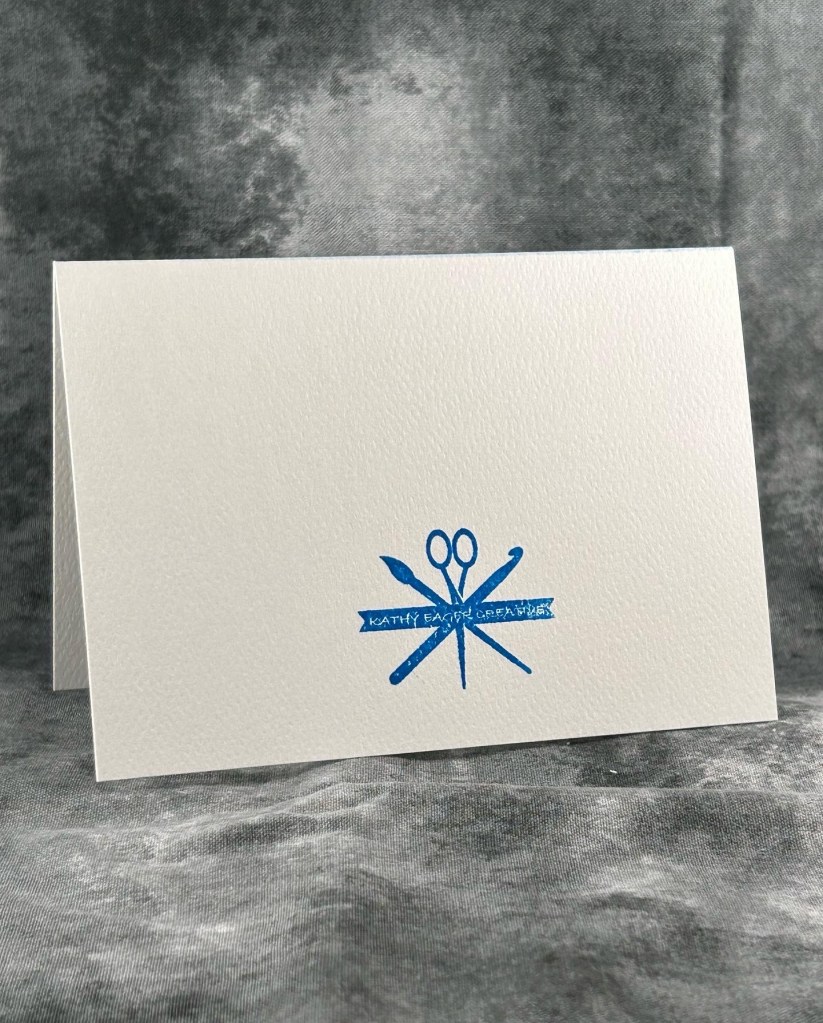
The greeting cards have been printed on 3 1/2″ by 5″ watercolor felt paper cards. The cards are blank inside with the Kathy Eager Creative logo hand stamped on the back. White envelopes are included with each card.
Choose a six-pack of blue, a six-pack of green, or a mix pack (three of each).
For the original paintings, I used Sennelier professional watercolor paints and Sakura pigma archival pens on Arches cold press 300 lb watercolor paper.
Colors may vary slightly in person versus on screen.


The price is $14 for six (please indicate 6 green, 6 blue, or 6 mix) and includes first-class mail shipping within the U.S. Shipping is available outside the U.S at an extra cost.
Please feel free to contact me with any questions.
-
Stickers!
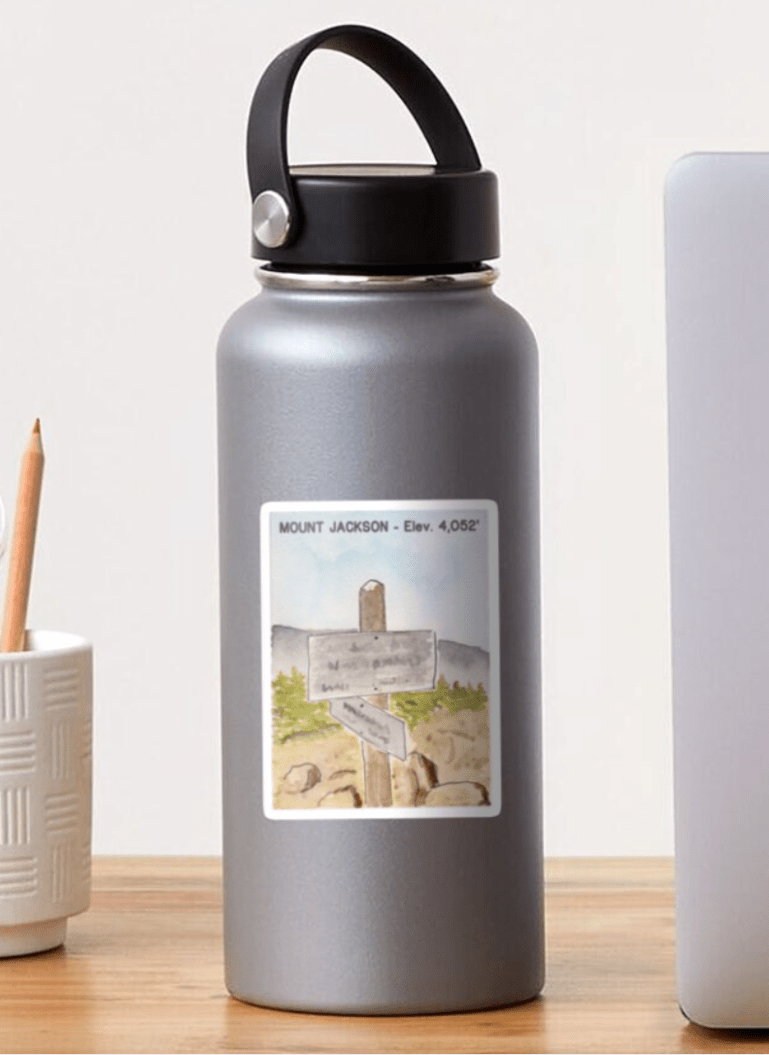
I’ve started posting some of my watercolor paintings to Redbubble and they make really cute stickers!
Here is a link to the shop, Redbubble. I’ll be adding to these as I create more of my paintings of the New Hampshire 48 4000 footers.

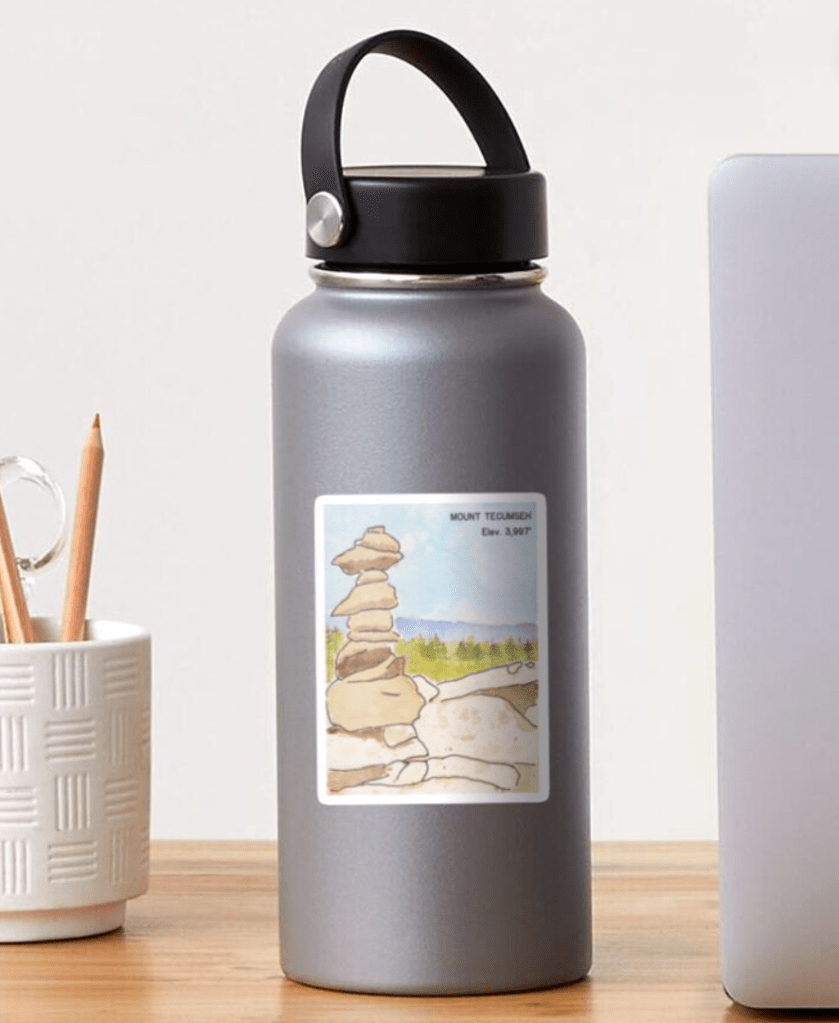

The Mt. Tecumseh and Mt. Jackson paintings are also available as notebooks, and they look great! I even bought one for myself.

Let me know if you want to see any other of my paintings in the Redbubble shop!

I'm a geek and I make things


